# Read Me First
Welcome to z4ch nodes. Stay a while and read on!
## About Me
Hey there, I am **z4ch** AKA **ZachZwei**.
I am a crypto enthusiast with more than 10 years experience in the field of Customer Service primarily in Technical Support. My exposure into crypto started around 2017. I worked as a Customer Support Lead / Community Manager at [Trust Wallet](https://trustwallet.com/) from 2019 to 2022. Some of my notable works was designing their ticketing system and the [Trust Wallet Community](https://community.trustwallet.com/) knowledge base. \
\
I am no developer, and have no coding background. I am a technician and I figure stuff out. I like creating easy to follow guides and faqs for the average joe.
## Disclaimer
The information provided on this website is for educational and general informational purposes only. While we strive to keep the information up-to-date and accurate, we make no representations or warranties of any kind, express or implied, about the completeness, accuracy, reliability, suitability, or availability with respect to the website or the information, products, services, or related graphics contained on the website for any purpose.
Any reliance you place on such information is therefore strictly at your own risk. We shall not be liable for any loss or damage, including without limitation, indirect or consequential financial or mental loss or damage, or any loss or damage whatsoever arising from loss of data or profits arising out of, or in connection with, the use of this website.
It is always recommended to seek professional advice before making any financial or business decisions based on information from this website.
### Proceed at your own risk.
# Bellish
This is a compilation of BellsChain ($BELLS) related content for Bellish people.
#### Disclaimer:
Nothing in this page is to be taken as Financial Advise, please do not.\
I repeat. Nothing in this page is to be taken as Financial Advise.
### Introduction
BellsChain is a restart of the original Bellscoin that was created by Billy Markus. He created Bellscoin by forking Luckycoin code. He then used this existing code for Dogecoin, and the rest is history.
Billy Markus created both Dogecoin and Bellscoin. The OG meme and the Doge Daddy.\
You can see the complete lineage below.
BellsChain is now merge-mined with Litecoin and Dogecoin since August 18, 2024. Which makes it one of the most secure chains in the Scrypt Ecosystem. It will not die again until the last Litecoin miner is hashing.
## Bellish Content
Here are some recommended articles and videos where you can learn more about BellsChain ($BELLS). Kudos to the community for sharing all these valuable insights and educational content.\
\
LFG
### Bellish Articles
* [Bellscoin Investment Thesis](https://medium.com/@bellscoin/bellscoin-investment-thesis-307190c0ce03) by [ScryptSupremacy](https://x.com/ScryptSupremacy)
* [Once there “WAS” a forked Bellscoin](https://medium.com/@bellscoin/once-there-was-forked-bellscoin-d39bc9c9248a)
* [What BillyM2K said about Bellscoin](https://medium.com/@bellscoin/what-billym2k-said-about-bellscoin-fcbdf4056aae)
* [What BillyM2K said about Bellscoin (2)](https://medium.com/@bellscoin/what-billym2k-said-about-bellscoin-2-21dcc1765287)
* [How to do Merge Mining LTC+DOGE+BEL](https://medium.com/@bellscoin/how-to-do-merge-mining-ltc-doge-bel-210f96deee71)
Go to The Bellscoin Blog by [BellsChain](https://x.com/BellsChain) for more.
{% embed url="" %}
### Bellish Videos
* [What is Bellscoin? w/Adam McBride](https://www.youtube.com/watch?v=ILp5KriqlYU\&pp=ygUJYmVsbHNjb2lu)
* [The Next Billion Dollar Meme Coin...Bellscoin Interview](https://www.youtube.com/watch?v=2Bl8jMDIZUc\&pp=ygUJYmVsbHNjb2lu)
* [Adam McBride on Bellscoin: the Original Memecoin & Forgotten Parent of Doge](https://www.youtube.com/watch?v=3GHKwvxkU2Y\&pp=ygUJYmVsbHNjb2lu)
* [How To Mine Bellscoin BEL with Dogecoin and Litecoin!](https://www.youtube.com/watch?v=R2E2iXpeOf4\&pp=ygUJYmVsbHNjb2lu)
* Bells Corner with Adam McBride, by [OrdinalRevolution](https://www.youtube.com/@OrdinalRevolution) (Multiple Episodes)
* [The Next DOGE!? BellsCoin](https://www.youtube.com/watch?v=2cRz51xscBU)
### Bellish Spaces
* [PoW Guardians Series - LTC\&Doge\&BELL](https://x.com/ETCGrantsDao/status/1846635572959629762)
* [Between 2 Degens w/ @LukeWrightmain](https://x.com/i/broadcasts/1OyKAZAEDZaGb)
* [Bellscoin 11th Anniversary ](https://x.com/adamamcbride/status/1862246454422655003)
### BellsChain Upcoming Milestones
Go here:
Thanks for reading. [Here is picture of Litecoin + Dogecoin and Bells](https://x.com/litecoin/status/1865011809994117233)
### How to Support BellsChain
* Support Nintondo Developers:
* Listings and Liquidity Providers:
## Bellscoin Resources
Official Site: [https://bellscoin.com](https://bellscoin.com/)\
Explorer: \
Follow X: \
Join Discord: \
Join Telegram:
### How to Buy $BELLS
Centralized Exchanges (includes referral link):
* [NonKYC](https://nonkyc.io/?ref=658045d205279ea14f3a7169)
* [CoinEX](https://www.coinex.com/register?refer_code=38a4q)
* [Gate.io](https://www.gate.io/ref/VlVGBgoN?ref_type=102)
* [MEXC](https://www.mexc.com/register?inviteCode=13dUe)
[DEXScreener](https://dexscreener.com/solana/BELLSsjNh6715KiorEhPw5NMt1AVuDdiwMYmkN4tBS5D) (Use a Solana Wallet)
### My Bellscoin Research
* [The Genesis Block message is the same](https://x.com/ZachZwei/status/1862512487868112906)
* [The Bellscoin logo on the Dogecoin client](https://x.com/ZachZwei/status/1862897218107453770)
* [AI comparing repos of Luckycoin, Bellscoin and Dogecoin to explain lineage](https://x.com/ZachZwei/status/1863226678740492632)
* [Vice article interview with Billy (oldest mention of Bells)](https://x.com/ZachZwei/status/1864928815597928774)
* [Doge dev knows about Bells](https://x.com/ZachZwei/status/1865777254904852755)
* [The Bellscoin Logo on OG Dogecoin client (video)](https://x.com/ZachZwei/status/1863270288974344270)
# Nodes
Guides in setting up Nodes
# Lava
LavaNet Node and Provider setup
# Lava Node Setup
Follow this guide to run your own LavaNet node and use it for your Lava Provider.
This is not financial advise. All information provided here are sourced from the following sites:\
\
Hardware requirements:\
RAM: 64 GB RAM\
Storage: 2 TB NVME SSD\
OS: Linux 22.04\
Rent a server here (optional):
### Set Node name
Change it to anything you like.
```
MONIKER="my_node"
```
### Install dependencies
```
sudo apt -q update
sudo apt -qy install curl git jq lz4 build-essential
sudo apt -qy upgrade
```
#### Install GO
This will install Go version `1.22.8`
```
sudo rm -rf /usr/local/go
curl -Ls https://go.dev/dl/go1.22.8.linux-amd64.tar.gz | sudo tar -xzf - -C /usr/local
eval $(echo 'export PATH=$PATH:/usr/local/go/bin' | sudo tee /etc/profile.d/golang.sh)
eval $(echo 'export PATH=$PATH:$HOME/go/bin' | tee -a $HOME/.profile)
go version
```
### Download and build binaries
```
# Clone project repository
cd $HOME
rm -rf lava
git clone https://github.com/lavanet/lava.git
cd lava
git checkout v3.1.0
# Build binaries
export LAVA_BINARY=lavad
make build
# Prepare binaries for Cosmovisor
mkdir -p $HOME/.lava/cosmovisor/genesis/bin
mv build/lavad $HOME/.lava/cosmovisor/genesis/bin/
rm -rf build
# Create application symlinks
sudo ln -s $HOME/.lava/cosmovisor/genesis $HOME/.lava/cosmovisor/current -f
sudo ln -s $HOME/.lava/cosmovisor/current/bin/lavad /usr/local/bin/lavad -f
```
### Install Cosmovisor and create a service
```
# Download and install Cosmovisor
go install cosmossdk.io/tools/cosmovisor/cmd/cosmovisor@v1.6.0
# Create service
sudo tee /etc/systemd/system/lava.service > /dev/null << EOF
[Unit]
Description=lava node service
After=network-online.target
[Service]
User=$USER
ExecStart=$(which cosmovisor) run start
Restart=on-failure
RestartSec=10
LimitNOFILE=65535
Environment="DAEMON_HOME=$HOME/.lava"
Environment="DAEMON_NAME=lavad"
Environment="UNSAFE_SKIP_BACKUP=true"
[Install]
WantedBy=multi-user.target
EOF
sudo systemctl daemon-reload
sudo systemctl enable lava.service
```
### Initialize the node
```
# Set node configuration
lavad config chain-id lava-mainnet-1
lavad config keyring-backend file
lavad config node tcp://localhost:14457
# Initialize the node
lavad init $MONIKER --chain-id lava-mainnet-1
# Download genesis and addrbook
curl -Ls https://snapshots.kjnodes.com/lava/genesis.json > $HOME/.lava/config/genesis.json
curl -Ls https://snapshots.kjnodes.com/lava/addrbook.json > $HOME/.lava/config/addrbook.json
# Add seeds
sed -i -e "s|^seeds *=.*|seeds = \"400f3d9e30b69e78a7fb891f60d76fa3c73f0ecc@lava.rpc.kjnodes.com:14459\"|" $HOME/.lava/config/config.toml
# Set minimum gas price
sed -i -e "s|^minimum-gas-prices *=.*|minimum-gas-prices = \"0.000000001ulava\"|" $HOME/.lava/config/app.toml
# Set pruning
sed -i \
-e 's|^pruning *=.*|pruning = "custom"|' \
-e 's|^pruning-keep-recent *=.*|pruning-keep-recent = "100"|' \
-e 's|^pruning-keep-every *=.*|pruning-keep-every = "0"|' \
-e 's|^pruning-interval *=.*|pruning-interval = "19"|' \
$HOME/.lava/config/app.toml
# Set custom ports
sed -i -e "s%^proxy_app = \"tcp://127.0.0.1:26658\"%proxy_app = \"tcp://127.0.0.1:14458\"%; s%^laddr = \"tcp://127.0.0.1:26657\"%laddr = \"tcp://127.0.0.1:14457\"%; s%^pprof_laddr = \"localhost:6060\"%pprof_laddr = \"localhost:14460\"%; s%^laddr = \"tcp://0.0.0.0:26656\"%laddr = \"tcp://0.0.0.0:14456\"%; s%^prometheus_listen_addr = \":26660\"%prometheus_listen_addr = \":14466\"%" $HOME/.lava/config/config.toml
sed -i -e "s%^address = \"tcp://0.0.0.0:1317\"%address = \"tcp://0.0.0.0:14417\"%; s%^address = \":8080\"%address = \":14480\"%; s%^address = \"0.0.0.0:9090\"%address = \"0.0.0.0:14490\"%; s%^address = \"0.0.0.0:9091\"%address = \"0.0.0.0:14491\"%; s%:8545%:14445%; s%:8546%:14446%; s%:6065%:14465%" $HOME/.lava/config/app.toml
```
### Update chain-specific configuration
```
sed -i \
-e 's/timeout_commit = ".*"/timeout_commit = "30s"/g' \
-e 's/timeout_propose = ".*"/timeout_propose = "1s"/g' \
-e 's/timeout_precommit = ".*"/timeout_precommit = "1s"/g' \
-e 's/timeout_precommit_delta = ".*"/timeout_precommit_delta = "500ms"/g' \
-e 's/timeout_prevote = ".*"/timeout_prevote = "1s"/g' \
-e 's/timeout_prevote_delta = ".*"/timeout_prevote_delta = "500ms"/g' \
-e 's/timeout_propose_delta = ".*"/timeout_propose_delta = "500ms"/g' \
-e 's/skip_timeout_commit = ".*"/skip_timeout_commit = false/g' \
$HOME/.lava/config/config.toml
```
### Set Ports
This is a more simplified command to manually set the Ports of your LavaNet node. You can manually change it depending on your needs. Make sure there are no conflicts as this might cause the node to not run.
```
CUSTOM_PORT=144
sed -i -e "s%^proxy_app = \"tcp://127.0.0.1:26658\"%proxy_app = \"tcp://127.0.0.1:${CUSTOM_PORT}58\"%; s%^laddr = \"tcp://127.0.0.1:26657\"%laddr = \"tcp://0.0.0.0:${CUSTOM_PORT}57\"%; s%^pprof_laddr = \"localhost:6060\"%pprof_laddr = \"localhost:${CUSTOM_PORT}60\"%; s%^laddr = \"tcp://0.0.0.0:26656\"%laddr = \"tcp://0.0.0.0:${CUSTOM_PORT}56\"%; s%^prometheus_listen_addr = \":26660\"%prometheus_listen_addr = \":${CUSTOM_PORT}66\"%" $HOME/.evmosd/config/config.toml
sed -i -e "s%^address = \"tcp://localhost:1317\"%address = \"tcp://0.0.0.0:${CUSTOM_PORT}17\"%; s%^address = \":8080\"%address = \":${CUSTOM_PORT}80\"%; s%^address = \"localhost:9090\"%address = \"0.0.0.0:${CUSTOM_PORT}90\"%; s%^address = \"localhost:9091\"%address = \"0.0.0.0:${CUSTOM_PORT}91\"%; s%^address = \"127.0.0.1:8545\"%address = \"0.0.0.0:${CUSTOM_PORT}45\"%; s%^ws-address = \"127.0.0.1:8546\"%ws-address = \"0.0.0.0:${CUSTOM_PORT}46\"%" $HOME/.evmosd/config/app.toml
```
### Download latest chain snapshot
```
curl -L https://snapshots.kjnodes.com/lava/snapshot_latest.tar.lz4 | tar -Ilz4 -xf - -C $HOME/.lava
[[ -f $HOME/.lava/data/upgrade-info.json ]] && cp $HOME/.lava/data/upgrade-info.json $HOME/.lava/cosmovisor/genesis/upgrade-info.json
```
Make sure that the port numbers you will assign is not in use.
Use this command to check.
```
netstat -na | grep [port-number]
```
Replace `port-number` depending on what port you are trying to check.
* Tendermint RPC
Navigate to `/.lava/config` and open `config.toml` file. Take note of the URL and Port.

* Rest (API)
Navigate to `/.lava/config` and open `app.toml` file. Take note of the URL and Port. Make sure it is set to `enable = true`.

* gRPC
Navigate to `/.lava/config` and open `app.toml` file. Take note of the URL and Port. Make sure both gRPC and gRPC-web is set to `enable = true`.

### Setup Firewall
These are just recommended port settings, which I am currently using. \
Change it depending on your own server settings.
```
sudo ufw default deny incoming
sudo ufw default allow outgoing
#ssh port
sudo ufw allow 22
#webmin port
sudo ufw allow 10000
#Allowed Ports
sudo ufw allow 14456/tcp
sudo ufw allow 14457/tcp
sudo ufw allow 14460/tcp
sudo ufw allow 14490/tcp
sudo ufw allow 14417/tcp
sudo ufw allow 26666/tcp
sudo ufw allow 26667/tcp
sudo ufw allow 26670/tcp
sudo ufw allow 2224
sudo ufw allow 443
sudo ufw allow 80
sudo ufw enable
```
### Start service and check the logs
```
sudo systemctl start lava.service && sudo journalctl -u lava.service -f --no-hostname -o cat
```
#### Check sync status
Run the following command:
```
lavad status 2>&1 | jq .SyncInfo
```
If you get a result `false` that means node is fully synced.
Check connected peers:
```
sudo netstat -anp | grep ESTABLISHED | grep lavad | grep -v \"127.0.0.1\
```
### Archive Snapshot
If you want to run a full archive node, you can use this snapshot. The following commands will delete the existing /data folder. Make sure you create a backup in case you need it. Set the proper pruning settings to `nothing` before running the node.
```
sudo systemctl stop lava.service
cp $HOME/.lava/data/priv_validator_state.json $HOME/.lava/priv_validator_state.json.backup
rm -rf $HOME/.lava/data
curl -L https://storage.mellifera.network/lava_mainnet/archive_1463986.tar.lz4 | tar -Ilz4 -xf - -C $HOME/.lava
mv $HOME/.lava/priv_validator_state.json.backup $HOME/.lava/data/priv_validator_state.json
```
Start the node and let it sync
```
sudo systemctl start lava.service && sudo journalctl -u lava.service -f --no-hostname -o cat
```
# Lave Wallet Setup
Warning!
Make sure your node is fully synced before proceeding.
### Adding a Key (Wallet) to Node
Ensure you understand the implications of storing your private key in your chosen keyring.
1. Substitute $ACCOUNT\_NAME with your desired account name:
```bash
current_lavad_binary="$HOME/.lava/cosmovisor/current/bin/lavad"
ACCOUNT_NAME="name_here"
$current_lavad_binary keys add $ACCOUNT_NAME
```
Securely store your mnemonic in a safe location, as it cannot be retrieved once lost.
2. Verify and locate your account in the keys list:
```bash
$current_lavad_binary keys show $ACCOUNT_NAME
$current_lavad_binary keys list
```
Pencils out 📝 Your public address begins with lava\@.
### Restore a Wallet
1. Recover an existing account using your mnemonic:
```bash
lavad keys add $NEW_NAME --recover
```
After entering your seed phrase:
```bash
$current_lavad_binary keys show $ACCOUNT_NAME
```
# Lava Provider Setup
All providers on `lava-mainnet-1` must use a domain name and TLS (1.3). You must have a domain name to continue. If you have not already, please take a moment to purchase one! You can find cheap top-level domains [here](https://www.namecheap.com/) or [here](https://tld-list.com/).
### Setup Domain
#### Modify DNS settings
The first step of establishing your Provider is to modify some of the DNS settings on the domain you purchased. In specific, you'll need to change the A Records on your domain.

### Configure Nginx
#### Install dependencies
```bash
sudo apt update
sudo apt install certbot net-tools nginx python3-certbot-nginx -y
```
Generate Certificate
Use `certbot` to create a certificate:
```
sudo certbot certonly -d your-site.com -d lava.your-site.com -d eth.your-site.com
```
#### Validate Certificate
Note: ✅ `your-site.com` refers to the Domain name that you purchased and configured.
Let's make sure your certificate successfully installed! ✅ Input the following command:
```
sudo certbot certificates
```
Keep track of your output. If your certificate generation was successful, it should look as following:
`Found the following certs: Certificate Name: your-site.com Domains: your-site.com eth.your-site.com lava.your-site.com Expiry Date: 2023-11-07 14:37:29+00:00 (VALID: 84 days) Certificate Path: /etc/letsencrypt/live/your-site.com/fullchain.pem Private Key Path: /etc/letsencrypt/live/your-site.com/privkey.pem`
You'll need both `Certificate Path` and `Private Key Path` for your next step.
#### Add an Nginx Config for Each Domain
Note: ✅ `your-site.com` refers to the Domain name that you purchased and configured.
Lava recommends running each chain under a separate provider process. This will separate error logs and protect against complete provider failure in the case of a problematic provider process. The first step of this is to create different nginx routes for each chain.
For each chain that you want to support, you will need to create a separate `nginx` config file. `cd` into `/etc/nginx/sites-available/` and create a `server` file for each chain. You will need to select an open port for each chain. `Nginx` will use these config files to create your routes.
```
cd
cd /etc/nginx/sites-available/
```
Create the server file. For this guide, we will focus on `lava_server`
```
sudo nano lava_server
```
Copy and paste the text below. Save your `lava_server` file.
```
server {
listen 443 ssl http2;
server_name lava.your-site.com;
ssl_certificate /etc/letsencrypt/live/your-site.com/fullchain.pem;
ssl_certificate_key /etc/letsencrypt/live/your-site.com/privkey.pem;
error_log /var/log/nginx/debug.log debug;
location / {
proxy_pass http://127.0.0.1:26657;
grpc_pass 127.0.0.1:26657;
}
}
```
In most cases, after creating a configuration file in accessible sites, you need to create a symbolic link to this file in the enabled sites directory. This can be done with a command like:
```
sudo ln -s /etc/nginx/sites-available/lava_server /etc/nginx/sites-enabled/lava_server
```
#### Test Nginx Configuration
Now, ensure that your `nginx` setup is working! ✅
```bash
sudo nginx -t
```
🖳 Expected Output:
`nginx: the configuration file /etc/nginx/nginx.conf syntax is ok`
`nginx: configuration file /etc/nginx/nginx.conf test is successful`
#### Restart Nginx
You will need to refresh the Nginx server:
```bash
sudo systemctl restart nginx
```
#### Secure NGINX With Let’s Encrypt
Steps were taken here:
Run the following commands:
```
sudo certbot --nginx -d
```
Test auto renewal
```
sudo certbot renew --dry-run
```
Visit your site on HTTPS to check. Open a browser and then type `https://your-site.com`
If it shows a padlock or something like this then you are good to go.
HTTPS enabled
### Install Lavap
Since you are already running a node, you just need to configure the `lavap` service.
```
cd lava
git checkout v3.1.0
export LAVA_BINARY=lavap
make install
```
This will install v3.1.0 of lavap.
### Create the Provider Configuration
Copy and run the following to generate a lava.yml file in your /config folder.
The port numbers will be automatically added based on your node configuration. The RPC port will use 26657. You can change this to any port. Just make sure you use the same port you have configured for your domain.
```
RPC=$(cat $HOME/.lava/config/config.toml | sed -n '/TCP or UNIX socket address for the RPC server to listen on/{n;p;}' | sed 's/.*://; s/".*//')
GRPC=$(cat $HOME/.lava/config/app.toml | sed -n '/Address defines the gRPC server address to bind to/{n;p;}' | sed 's/.*://; s/".*//')
API=$(cat $HOME/.lava/config/app.toml | sed -n '/Address defines the API server to listen on./{n;p;}' | sed 's/.*://; s/".*//')
echo "RPC:"$RPC "GRPC:"$GRPC "API:"$API
mkdir $HOME/config
sudo tee << EOF >/dev/null $HOME/config/lava.yml
endpoints:
- api-interface: tendermintrpc
chain-id: LAVA
network-address:
address: 0.0.0.0:2224
disable-tls: true
node-urls:
- url: ws://127.0.0.1:$RPC/websocket
- url: http://127.0.0.1:$RPC
- api-interface: grpc
chain-id: LAVA
network-address:
address: 0.0.0.0:2224
disable-tls: true
node-urls:
url: 127.0.0.1:$GRPC
- api-interface: rest
chain-id: LAVA
network-address:
address: 0.0.0.0:2224
disable-tls: true
node-urls:
url: http://127.0.0.1:$API
EOF
```
#### Where to find ports?
You can find the following port numbers on the `config.toml` and `app.toml` files located at `./lava/config` folder.
* Tendermint RPC

* GRPC

* Rest (API)

#### Note:
Set the geolocation value depending on where your server is located.
```
GLS = 0; // Global-strict
USC = 1; // US-Center
EU = 2; // Europe
USE = 4; // US-East
USW = 8; // US-West
AF = 16; // Africa
AS = 32; // Asia
AU = 64; // (Australia, includes NZ)
GL = 65535; // Global
```
### Start the Provider
To start the Lava provider process, run the following command
```
lavap rpcprovider lava.yml --reward-server-storage $HOME/.lava/rewardserver --geolocation 2 --from z4ch --chain-id lava-mainnet-1 --keyring-backend file --log_level debug
```
Test the Provider Process!
Run the following command:
```
lavap test rpcprovider --from your_wallet_name_here --endpoints "your-site:443,LAVA"
```
🖳 Expected output:
```
📄----------------------------------------✨SUMMARY✨----------------------------------------📄
🔵 Tests Passed:
🔹LAV1-grpclatest block: 0x4ca8c
🔹LAV1-restlatest block: 0x4ca8c
🔹LAV1-tendermintrpclatest block: 0x4ca8c
🔵 Tests Failed:
🔹None 🎉! all tests passed ✅
🔵 Provider Port Validation:
🔹✅ All Ports are valid! ✅
```
❗ Make sure the tests are all passed before you stake your tokens.
### Stake the Provider on Chain
Use a variation of the following command to stake on chain; the minimum stake is `5000000000ulava or 5,000 LAVA`
```bash
MONIKER="Provider Name"
DOMAIN="Provider Domain URL"
PORT=443
echo $MONIKER $DOMAIN $PORT
lavap tx pairing stake-provider LAVA "5000000000ulava" "$DOMAIN:$PORT,[2]" [2] [validator] --from [wallet_name] --provider-moniker "$MONIKER" --delegate-limit "1000000000000ulava" --gas-prices 0.1ulava --gas-adjustment 1.5 --gas auto -y
```
Example:
`lavap tx pairing stake-provider LAVA "5000000000ulava" "lava.z4ch.xyz:443,2" 2 lava@valoper1amkaaut9fs395v3vpuymp6zmggva32mkkvr7rq --from z4ch --provider-moniker "zwei node" --delegate-limit "1000000000000ulava" --gas-prices 0.1ulava --gas-adjustment 1.5 --gas auto -y`
Some notes:
* `[validator]` you need to indicate a validator address, choose here:
* `[2]` replace this with the corresponding geolocation of your server
* `--from` should be followed by the key name of your funded account that you will use to stake your provider
* `--provider-moniker` will be the name of your provider
#### Congratulations, your LAVA Provider is now up and running.
### Updating Lava Provider
Since you are running `lavap` without `lavavisor` if there are updates necessary, you would have to manually run an update. Here are the steps to do so.
1. Close all running Provider process `CTRL+C`
2. Delete the current `lava` folder and download the most recent version. Check the [latest release](https://github.com/lavanet/lava/releases) available.
```
cd $HOME
rm -rf lava
git clone https://github.com/lavanet/lava.git
cd lava
git checkout
```
3. Build the `lavap` binaries.
```
export LAVA_BINARY=lavap
make install
```
4. Check `lavap` version
```
lavap version
```
5. Run Test to confirm. Then if all test passed, run Provider process.
### Addtiional Commands
Modify Provider
```
lavad tx pairing modify-provider LAVA
```
Get Provider Details
```
lavap q pairing account-info --from [wallet_name]
```
Get Provider Rewards
```
lavad tx dualstaking claim-rewards --from z4ch --gas-prices 1ulava --gas-adjustment 1.5 --gas auto -y
```
❗ If you have any further issues, do not hesitate to venture to our [discord](https://discord.com/invite/Tbk5NxTCdA) where you can get better assistance!
# Useful Lava CLI
Note:
* The following commands is what I use for my own Providers. Please make sure to change some variables based on your own configurations.
***
#### Add new wallet
```
lavad keys add wallet
```
#### Recover existing wallet (using seed phrase)
```
lavad keys add wallet --recover
```
#### List all keys
```
lavad keys list
```
***
#### Send tokens
```
lavad tx bank send 1000000ulava --fees 5000ulava -y
```
***
#### Stake/Restake Provider
```
lavap tx pairing stake-provider LAVA "5000000000ulava" "lava.z4ch.xyz:443,2" 2 lava@valoper1jt9w26mpxxjsk63mvd4m2ynj0af09csl0sjyut --from z4ch2 --provider-moniker z4ch-lava2 --delegate-limit "0ulava" --gas-prices 0.1ulava --gas-adjustment 1.5 --gas auto -y
```
#### Redelagate tokens
```
lavad tx staking redelegate [old_val] [new_val] [amount_tokens]ulava --from [wallet] --chain-id lava-testnet-2 --gas-adjustment 1.4 --gas auto --gas-prices 0.0001ulava -y
```
***
#### Freeze provider
```
lavap tx pairing freeze LAVA --from z4ch --reason "maintenance" --gas-prices 0.1ulava --gas-adjustment 1.5 --gas auto -y
```
#### Unfreeze provider
```
lavap tx pairing unfreeze LAVA --from z4ch --gas-prices 0.1ulava --gas-adjustment 1.5 --gas auto -y
```
#### Check accounts (delegations/frozen)
```
lavad q pairing account-info --from z4ch
```
***
#### Check relay payments
```
lavap test events 200 --event lava_relay_payment --from z4ch
```
This command will scan events with "lava\_relay\_payment" from 200 blocks then forward. You can set a different number.
```
lavap test events 0 --event lava_relay_payment --from z4ch
```
This command will scan events wit "lava\_relay\_paymnet" from current block then forward. You need to manually stop the command to stop the logs.
Check QoS
```
lavad test events 200 --show-attribute Excellence --from z4ch
```
#### Get Provider Rewards
```
lavad tx dualstaking claim-rewards --from z4ch --gas-prices 1ulava --gas-adjustment 1.5 --gas auto -y
```
***
#### Test Provider
```
lavap test rpcprovider --from z4ch
```
#### Start/Stop/Restart Provider
```
sudo systemctl start lavap
sudo systemctl stop lavap
sudo systemctl restart lavap
```
#### Start/Stop/Restart Lava Node
```
sudo systemctl start lavad
sudo systemctl stop lavad
sudo systemctl restart lavad
```
#### Upgrade provider
```
cd $HOME
rm -rf lava
git clone https://github.com/lavanet/lava.git
cd lava
git checkout
export LAVA_BINARY=lavap
make install
```
#### Alias commands
Wallet Specific
```
# general commands
echo "alias reward='lavad q pairing provider-monthly-payout z4ch'" >> ~/.bashrc
echo "alias reward2='lavad q pairing provider-monthly-payout z4ch2'" >> ~/.bashrc
echo "alias testprovider='lavap test rpcprovider --from z4ch'" >> ~/.bashrc
echo "alias statsprovider='lavad q pairing account-info --from z4ch'" >> ~/.bashrc
# Source the .bashrc file automatically to apply the changes
source ~/.bashrc
```
LAVA (lava) commands
```
# lava commands
echo "alias lavapeers='sudo netstat -anp | grep ESTABLISHED | grep lavad | grep -v \127.0.0.1'" >> ~/.bashrc
echo "alias lavasync='lavad status 2>&1 | jq .SyncInfo'" >> ~/.bashrc
echo "alias lavalogs='sudo journalctl -u lava.service -f --no-hostname -o cat'" >> ~/.bashrc
echo "alias lavastart='sudo systemctl start lava.service'" >> ~/.bashrc
echo "alias lavastop='sudo systemctl stop lava.service'" >> ~/.bashrc
source ~/.bashrc
```
Cosmos (gaia) commands
```
# gaia commands
echo "alias gaiapeers='sudo netstat -anp | grep ESTABLISHED | grep gaiad | grep -v \127.0.0.1'" >> ~/.bashrc
echo "alias gaiasync='gaiad status 2>&1 | jq .sync_info'" >> ~/.bashrc
echo "alias gaialogs='sudo journalctl -u cosmoshub.service -f --no-hostname -o cat'" >> ~/.bashrc
echo "alias gaiastart='sudo systemctl start cosmoshub.service'" >> ~/.bashrc
echo "alias gaiastop='sudo systemctl stop cosmoshub.service'" >> ~/.bashrc
source ~/.bashrc
```
Stargaze (stars) commands
```
# stars commands
echo "alias starspeers='sudo netstat -anp | grep ESTABLISHED | grep starsd | grep -v \127.0.0.1'" >> ~/.bashrc
echo "alias starssync='curl -s http://127.0.0.1:16457/status | jq .result.sync_info'" >> ~/.bashrc
echo "alias starslogs='sudo journalctl -fu stargaze'" >> ~/.bashrc
echo "alias starsstart='sudo service stargaze start'" >> ~/.bashrc
echo "alias starsstop='sudo service stargaze stop'" >> ~/.bashrc
source ~/.bashrc
```
Evmos (evmos) commands
```
# evmos commands
echo "alias evmospeers='sudo netstat -anp | grep ESTABLISHED | grep evmosd | grep -v \127.0.0.1'" >> ~/.bashrc
echo "alias evmossync='evmosd status 2>&1 | jq .SyncInfo'" >> ~/.bashrc
echo "alias evmoslogs='sudo journalctl -u evmosd -f --no-hostname -o cat'" >> ~/.bashrc
echo "alias evmosstart='sudo systemctl start evmosd'" >> ~/.bashrc
echo "alias evmosstop='sudo systemctl stop evmosd'" >> ~/.bashrc
source ~/.bashrc
```
Check LISTEN ports
```
# lava
netstat -tulpn | grep LISTEN | grep "lavad"
#gaia
netstat -tulpn | grep LISTEN | grep "gaiad"
#evmos
netstat -tulpn | grep LISTEN | grep "evmosd"
#stars
netstat -tulpn | grep LISTEN | grep "starsd"
```
Check if PORT is open
Replace $PORT with PORT number you want to check
```
sudo lsof -i:$PORT
```
# Cosmos Hub
Cosmos Hub Node and Provider setup
# Cosmos Hub Node Setup
Follow this guide to run your own Cosmos Hub node and use it for your Lava Provider.
This is not financial advise. All information provided here are sourced from the following sites:\
\
\
\
Hardware requirements:\
RAM: 64 GB RAM\
Storage: 2 TB NVME SSD\
OS: Linux 22.04\
Rent a server here (optional):
### Firewall Settings
Run the following commands:
```
sudo ufw default deny incoming
sudo ufw default allow outgoing
sudo ufw allow 22
#Allowed Ports
sudo ufw allow 26656/tcp
sudo ufw allow 26657/tcp
sudo ufw allow 26660/tcp
sudo ufw allow 9090/tcp
sudo ufw allow 1317/tcp
sudo ufw enable
```
These are the default ports that Cosmos Hub uses. \
You can change it depending on your machine.
For reference, this is what I use for my servers:
```
sudo ufw default deny incoming
sudo ufw default allow outgoing
#ssh port
sudo ufw allow 22
#webmin port
sudo ufw allow 10000
#Allowed Ports
sudo ufw allow 13456/tcp
sudo ufw allow 13457/tcp
sudo ufw allow 13460/tcp
sudo ufw allow 13490/tcp
sudo ufw allow 13417/tcp
sudo ufw allow 26656/tcp
sudo ufw allow 26657/tcp
sudo ufw allow 26660/tcp
sudo ufw allow 2223
sudo ufw allow 443
sudo ufw allow 80
sudo ufw enable
```
### Set Node name
Change it to anything you like.
```
MONIKER="my_node"
```
### Install dependencies
#### **Update system and install build tools**
```
sudo apt -q update
sudo apt -qy install curl git jq lz4 build-essential
sudo apt -qy upgrade
```
#### **Install Go**
```
sudo rm -rf /usr/local/go
curl -Ls https://go.dev/dl/go1.22.8.linux-amd64.tar.gz | sudo tar -xzf - -C /usr/local
eval $(echo 'export PATH=$PATH:/usr/local/go/bin' | sudo tee /etc/profile.d/golang.sh)
eval $(echo 'export PATH=$PATH:$HOME/go/bin' | tee -a $HOME/.profile)
go version
```
### Download and build binaries
```
# Clone project repository
cd $HOME
rm -rf gaia
git clone https://github.com/cosmos/gaia.git
cd gaia
git checkout v20.0.0
# Build binaries
make build
# Prepare binaries for Cosmovisor
mkdir -p $HOME/.gaia/cosmovisor/genesis/bin
mv build/gaiad $HOME/.gaia/cosmovisor/genesis/bin/
rm -rf build
# Create application symlinks
sudo ln -s $HOME/.gaia/cosmovisor/genesis $HOME/.gaia/cosmovisor/current -f
sudo ln -s $HOME/.gaia/cosmovisor/current/bin/gaiad /usr/local/bin/gaiad -f
```
#### Install Cosmovisor and create a service
```
# Download and install Cosmovisor
go install cosmossdk.io/tools/cosmovisor/cmd/cosmovisor@v1.6.0
# Create service
sudo tee /etc/systemd/system/cosmoshub.service > /dev/null << EOF
[Unit]
Description=cosmoshub node service
After=network-online.target
[Service]
User=$USER
ExecStart=$(which cosmovisor) run start
Restart=on-failure
RestartSec=10
LimitNOFILE=65535
Environment="DAEMON_HOME=$HOME/.gaia"
Environment="DAEMON_NAME=gaiad"
Environment="UNSAFE_SKIP_BACKUP=true"
Environment="PATH=/usr/local/sbin:/usr/local/bin:/usr/sbin:/usr/bin:/sbin:/bin:/usr/games:/usr/local/games:/snap/bin:$HOME/.gaia/cosmovisor/current/bin"
[Install]
WantedBy=multi-user.target
EOF
sudo systemctl daemon-reload
sudo systemctl enable cosmoshub.service
```
### Set node configuration
```
# Set node configuration
gaiad config set client chain-id cosmoshub-4
gaiad config set client keyring-backend file
gaiad config set client node tcp://localhost:13457
```
#### Initialize the node
```
# Initialize the node
gaiad init $MONIKER --chain-id cosmoshub-4
# Download genesis and addrbook
curl -Ls https://snapshots.kjnodes.com/cosmoshub/genesis.json > $HOME/.gaia/config/genesis.json
curl -Ls https://snapshots.kjnodes.com/cosmoshub/addrbook.json > $HOME/.gaia/config/addrbook.json
# Add seeds
sed -i -e "s|^seeds *=.*|seeds = \"400f3d9e30b69e78a7fb891f60d76fa3c73f0ecc@cosmoshub.rpc.kjnodes.com:13459\"|" $HOME/.gaia/config/config.toml
# Set minimum gas price
sed -i -e "s|^minimum-gas-prices *=.*|minimum-gas-prices = \"0.005uatom\"|" $HOME/.gaia/config/app.toml
# Set pruning
sed -i \
-e 's|^pruning *=.*|pruning = "custom"|' \
-e 's|^pruning-keep-recent *=.*|pruning-keep-recent = "100"|' \
-e 's|^pruning-keep-every *=.*|pruning-keep-every = "0"|' \
-e 's|^pruning-interval *=.*|pruning-interval = "19"|' \
$HOME/.gaia/config/app.toml
# Set custom ports
sed -i -e "s%^proxy_app = \"tcp://127.0.0.1:26658\"%proxy_app = \"tcp://127.0.0.1:13458\"%; s%^laddr = \"tcp://127.0.0.1:26657\"%laddr = \"tcp://127.0.0.1:13457\"%; s%^pprof_laddr = \"localhost:6060\"%pprof_laddr = \"localhost:13460\"%; s%^laddr = \"tcp://0.0.0.0:26656\"%laddr = \"tcp://0.0.0.0:13456\"%; s%^prometheus_listen_addr = \":26660\"%prometheus_listen_addr = \":13466\"%" $HOME/.gaia/config/config.toml
sed -i -e "s%^address = \"tcp://0.0.0.0:1317\"%address = \"tcp://0.0.0.0:13417\"%; s%^address = \":8080\"%address = \":13480\"%; s%^address = \"0.0.0.0:9090\"%address = \"0.0.0.0:13490\"%; s%^address = \"0.0.0.0:9091\"%address = \"0.0.0.0:13491\"%; s%:8545%:13445%; s%:8546%:13446%; s%:6065%:13465%" $HOME/.gaia/config/app.toml
```
### Set Ports
This is a more simplified command to manually set the Ports of your LavaNet node. You can manually change it depending on your needs. Make sure there are no conflicts as this might cause the node to not run.
```
CUSTOM_PORT=134
sed -i -e "s%^proxy_app = \"tcp://127.0.0.1:26658\"%proxy_app = \"tcp://127.0.0.1:${CUSTOM_PORT}58\"%; s%^laddr = \"tcp://127.0.0.1:26657\"%laddr = \"tcp://0.0.0.0:${CUSTOM_PORT}57\"%; s%^pprof_laddr = \"localhost:6060\"%pprof_laddr = \"localhost:${CUSTOM_PORT}60\"%; s%^laddr = \"tcp://0.0.0.0:26656\"%laddr = \"tcp://0.0.0.0:${CUSTOM_PORT}56\"%; s%^prometheus_listen_addr = \":26660\"%prometheus_listen_addr = \":${CUSTOM_PORT}66\"%" $HOME/.evmosd/config/config.toml
sed -i -e "s%^address = \"tcp://localhost:1317\"%address = \"tcp://0.0.0.0:${CUSTOM_PORT}17\"%; s%^address = \":8080\"%address = \":${CUSTOM_PORT}80\"%; s%^address = \"localhost:9090\"%address = \"0.0.0.0:${CUSTOM_PORT}90\"%; s%^address = \"localhost:9091\"%address = \"0.0.0.0:${CUSTOM_PORT}91\"%; s%^address = \"127.0.0.1:8545\"%address = \"0.0.0.0:${CUSTOM_PORT}45\"%; s%^ws-address = \"127.0.0.1:8546\"%ws-address = \"0.0.0.0:${CUSTOM_PORT}46\"%" $HOME/.evmosd/config/app.toml
```
### Download latest chain snapshot
```
curl -L https://snapshots.kjnodes.com/cosmoshub/snapshot_latest.tar.lz4 | tar -Ilz4 -xf - -C $HOME/.gaia
[[ -f $HOME/.gaia/data/upgrade-info.json ]] && cp $HOME/.gaia/data/upgrade-info.json $HOME/.gaia/cosmovisor/genesis/upgrade-info.json
```
### Start service and check the logs
```
sudo systemctl start cosmoshub.service && sudo journalctl -u cosmoshub.service -f --no-hostname -o cat
```
Congratulations. You are now running a Stargaze Node.
#### (Optional)
Alternate Snapshot from NodeStake. By doing the following steps, this will clear any snapshot you have download. Backup your /data folder in case you need it. Make sure to set the correct pruning settings for this snapshot before running your node.
Stop your Node. Run the following commands:
```
cp $HOME/.gaia/data/priv_validator_state.json $HOME/.gaia/priv_validator_state.json.backup
rm -rf $HOME/.gaia/data
rm -rf $HOME/.gaia/wasm
gaiad tendermint unsafe-reset-all --home ~/.gaia/ --keep-addr-book
```
```
SNAP_NAME=$(curl -s https://ss.cosmos.nodestake.org/ | egrep -o ">20.*\.tar.lz4" | tr -d ">")
curl -o - -L https://ss.cosmos.nodestake.org/${SNAP_NAME} | lz4 -c -d - | tar -x -C $HOME/.gaia
mv $HOME/.gaia/priv_validator_state.json.backup $HOME/.gaia/data/priv_validator_state.json
```
#### Some Useful commands
Run the following to check connected peers:
```
sudo netstat -anp | grep ESTABLISHED | grep gaiad | grep -v \"127.0.0.1
```
Check sync status:
```
gaiad status 2>&1 | jq .sync_info
```
Alias commands
I use the following to replace the long commands above. It might differ depending on your configuration.
```
# gaia commands
echo "alias gaiapeers='sudo netstat -anp | grep ESTABLISHED | grep gaiad | grep -v \127.0.0.1'" >> ~/.bashrc
echo "alias gaiasync='gaiad status 2>&1 | jq .sync_info'" >> ~/.bashrc
echo "alias gaialogs='sudo journalctl -u cosmoshub.service -f --no-hostname -o cat'" >> ~/.bashrc
echo "alias gaiastart='sudo systemctl start cosmoshub.service'" >> ~/.bashrc
echo "alias gaiastop='sudo systemctl stop cosmoshub.service'" >> ~/.bashrc
source ~/.bashrc
```
# Cosmos Hub Provider Setup
Setting up your Cosmos Hub Provider will be similar to a Lava Provider.\
Follow the steps here for setting up your domain name:\
\
### Create the Provider file
Use the command below to generate the `.yml` file for COSMOSHUB.
```
RPC=$(cat $HOME/.gaia/config/config.toml | sed -n '/TCP or UNIX socket address for the RPC server to listen on/{n;p;}' | sed 's/.*://; s/".*//')
GRPC=$(cat $HOME/.gaia/config/app.toml | sed -n '/Address defines the gRPC server address to bind to/{n;p;}' | sed 's/.*://; s/".*//')
API=$(cat $HOME/.gaia/config/app.toml | sed -n '/Address defines the API server to listen on./{n;p;}' | sed 's/.*://; s/".*//')
echo "RPC:"$RPC "GRPC:"$GRPC "API:"$API
mkdir $HOME/config
sudo tee << EOF >/dev/null $HOME/config/atom.yml
endpoints:
- api-interface: tendermintrpc
chain-id: COSMOSHUB
network-address:
address: 0.0.0.0:2223
disable-tls: true
node-urls:
- url: ws://127.0.0.1:$RPC/websocket
- url: http://127.0.0.1:$RPC
- api-interface: grpc
chain-id: COSMOSHUB
network-address:
address: 0.0.0.0:2223
disable-tls: true
node-urls:
url: 127.0.0.1:$GRPC
- api-interface: rest
chain-id: COSMOSHUB
network-address:
address: 0.0.0.0:2223
disable-tls: true
node-urls:
url: http://127.0.0.1:$API
EOF
```
### Start the Provider
To start the Cosmos provider process, run the following command. \
Change the --geolocation value depending on where you server is located.\
Change the --from value depending on the name of your wallet
```
lavap rpcprovider atom.yml --reward-server-storage $HOME/.lava/rewardserver --geolocation 2 --from z4ch --chain-id lava-mainnet-1 --keyring-backend file --log_level debug
```
### Test the Provider Process!
Change the --from value depending on the name of your wallet.\
Change the --endpoints value depending on the domain you have setup
```
lavap test rpcprovider --from z4ch --endpoints "atom.z4ch.xyz:443,COSMOSHUB"
```
### Stake the Provider on Chain
Use a variation of the following command to stake on chain; the minimum stake is :
`15000000000ulava or 15,000 LAVA`
```
MONIKER="Provider Name"
DOMAIN="Provider Domain URL"
PORT=443
echo $MONIKER $DOMAIN $PORT
lavap tx pairing stake-provider COSMOSHUB "15000000000ulava" "$DOMAIN:$PORT,[2]" [2] [validator] --from [wallet_name] --provider-moniker "$MONIKER" --delegate-limit "1000000000000ulava" --gas-prices 0.1ulava --gas-adjustment 1.5 --gas auto -y
```
Example:
`lavap tx pairing stake-provider COSMOSHUB "15000000000ulava" "atom.z4ch.xyz:443,2" 2 lava@valoper1amkaaut9fs395v3vpuymp6zmggva32mkkvr7rq --from z4ch2 --provider-moniker "zwei node" --delegate-limit "1000000000000ulava" --gas-prices 0.1ulava --gas-adjustment 1.5 --gas auto -y`
Some notes:
* `[validator]` you need to indicate a validator address, choose here:
* `[2]` replace this with the corresponding geolocation of your server
* `--from` should be followed by the key name of your funded account that you will use to stake your provider
* `--provider-moniker` will be the name of your provider
**Congratulations, your Cosmos Provider is now up and running.**
# Stargaze
Stargaze Node and Provider setup
# Stargaze Node Setup
Follow this guide to run your own Stargaze node and use it for your Lava Provider.
This is not financial advise. All information provided here are sourced from the following sites:\
\
RAM: 64 GB RAM\
Storage: 2 TB NVME SSD\
OS: Linux 22.04\
Rent a server here (optional):
### Firewall Settings
Note:\
For reference, this is what I use for my servers:
```
sudo ufw default deny incoming
sudo ufw default allow outgoing
#ssh port
sudo ufw allow 22
#webmin port
sudo ufw allow 10000
#Allowed Ports
sudo ufw allow 16456/tcp
sudo ufw allow 16457/tcp
sudo ufw allow 16460/tcp
sudo ufw allow 16490/tcp
sudo ufw allow 16417/tcp
sudo ufw allow 26676/tcp
sudo ufw allow 26677/tcp
sudo ufw allow 26680/tcp
sudo ufw allow 2226
sudo ufw allow 443
sudo ufw allow 80
sudo ufw enable
```
### Set Node name
Change it to anything you like.
```
MONIKER="my_node"
```
### Install dependencies
#### **Update system and install build tools**
```
sudo apt -q update
sudo apt -qy install curl git jq lz4 build-essential
sudo apt -qy upgrade
```
#### **Install Go**
```
sudo rm -rf /usr/local/go
curl -Ls https://go.dev/dl/go1.22.8.linux-amd64.tar.gz | sudo tar -xzf - -C /usr/local
eval $(echo 'export PATH=$PATH:/usr/local/go/bin' | sudo tee /etc/profile.d/golang.sh)
eval $(echo 'export PATH=$PATH:$HOME/go/bin' | tee -a $HOME/.profile)
go version
```
### Download and build binaries
```
git clone https://github.com/public-awesome/stargaze stargaze
cd stargaze
git checkout v14.0.0
make install
```
#### Install Cosmovisor and create a service
```
# Download and install Cosmovisor
go install cosmossdk.io/tools/cosmovisor/cmd/cosmovisor@v1.6.0
# Create service
sudo tee /etc/systemd/system/stargaze.service > /dev/null << EOF
[Unit]
Description="stargaze node"
After=network-online.target
[Service]
User=$USER
ExecStart=$(which cosmovisor) run start
Restart=always
RestartSec=3
LimitNOFILE=4096
Environment="DAEMON_NAME=starsd"
Environment="DAEMON_HOME=$HOME/.starsd"
Environment="DAEMON_ALLOW_DOWNLOAD_BINARIES=false"
Environment="DAEMON_RESTART_AFTER_UPGRADE=true"
Environment="UNSAFE_SKIP_BACKUP=true"
[Install]
WantedBy=multi-user.target
EOF
sudo systemctl daemon-reload
sudo systemctl enable stargaze.service
```
Configure Cosmovisor
```
# Create Cosmovisor Folders
mkdir -p ~/.starsd/cosmovisor/genesis/bin
mkdir -p ~/.starsd/cosmovisor/upgrades
# Load Node Binary into Cosmovisor Folder
cp ~/go/bin/starsd ~/.starsd/cosmovisor/genesis/bin
```
### Set node configuration
Initialize node
```
starsd init $MONIKER --chain-id stargaze-1
```
Download Genesis file
```
wget -O genesis.json https://snapshots.polkachu.com/genesis/stargaze/genesis.json --inet4-only
mv genesis.json ~/.starsd/config
```
Configure Seed
```
sed -i 's/seeds = ""/seeds = "ade4d8bc8cbe014af6ebdf3cb7b1e9ad36f412c0@seeds.polkachu.com:13756"/' ~/.starsd/config/config.toml
```
### Set Ports
This is a more simplified command to manually set the Ports of your LavaNet node. You can manually change it depending on your needs. Make sure there are no conflicts as this might cause the node to not run.
```
CUSTOM_PORT=164
sed -i -e "s%^proxy_app = \"tcp://127.0.0.1:26658\"%proxy_app = \"tcp://127.0.0.1:${CUSTOM_PORT}58\"%; s%^laddr = \"tcp://127.0.0.1:26657\"%laddr = \"tcp://0.0.0.0:${CUSTOM_PORT}57\"%; s%^pprof_laddr = \"localhost:6060\"%pprof_laddr = \"localhost:${CUSTOM_PORT}60\"%; s%^laddr = \"tcp://0.0.0.0:26656\"%laddr = \"tcp://0.0.0.0:${CUSTOM_PORT}56\"%; s%^prometheus_listen_addr = \":26660\"%prometheus_listen_addr = \":${CUSTOM_PORT}66\"%" $HOME/.evmosd/config/config.toml
sed -i -e "s%^address = \"tcp://localhost:1317\"%address = \"tcp://0.0.0.0:${CUSTOM_PORT}17\"%; s%^address = \":8080\"%address = \":${CUSTOM_PORT}80\"%; s%^address = \"localhost:9090\"%address = \"0.0.0.0:${CUSTOM_PORT}90\"%; s%^address = \"localhost:9091\"%address = \"0.0.0.0:${CUSTOM_PORT}91\"%; s%^address = \"127.0.0.1:8545\"%address = \"0.0.0.0:${CUSTOM_PORT}45\"%; s%^ws-address = \"127.0.0.1:8546\"%ws-address = \"0.0.0.0:${CUSTOM_PORT}46\"%" $HOME/.evmosd/config/app.toml
```
### Download Snapshot
Get Snapshot. Wait for download to finish.
```
wget -O stargaze_15817491.tar.lz4 https://snapshots.polkachu.com/snapshots/stargaze/stargaze_15817491.tar.lz4 --inet4-only
```
Prepare for extraction
```
# Back up priv_validator_state.json if needed
cp ~/.starsd/data/priv_validator_state.json ~/.starsd/priv_validator_state.json
# Reset node state
starsd tendermint unsafe-reset-all --home $HOME/.starsd --keep-addr-book
rm -r ~/.starsd/wasm
```
Extract Snapshot
```
lz4 -c -d stargaze_15817491.tar.lz4 | tar -x -C $HOME/.starsd
```
Restore backup
```
# Replace with the backed-up priv_validator_state.json
cp ~/.starsd/priv_validator_state.json ~/.starsd/data/priv_validator_state.json
```
Make sure to set your Pruning settings properly before launching node.
Set the following on app.toml file

# Prune Type
pruning = "custom"

# Prune Strategy
pruning-keep-recent = "100"
pruning-keep-every = "0"
pruning-interval = "10"

Set the following on config.toml file

indexer = "kv"
### Start service and check the logs
```
sudo service stargaze start && sudo journalctl -fu stargaze
```
#### Some Useful commands
Run the following to check connected peers:
```
sudo netstat -anp | grep ESTABLISHED | grep starsd | grep -v \"127.0.0.1
```
Check sync status:
```
curl -s http://127.0.0.1:16457/status | jq .result.sync_info
```
#### Alias commands
I use the following to replace the long commands above. It might differ depending on your configuration.
```
# stars commands
echo "alias starspeers='sudo netstat -anp | grep ESTABLISHED | grep starsd | grep -v \127.0.0.1'" >> ~/.bashrc
echo "alias starssync='curl -s http://127.0.0.1:16457/status | jq .result.sync_info'" >> ~/.bashrc
echo "alias starslogs='sudo journalctl -fu stargaze'" >> ~/.bashrc
echo "alias starsstart='sudo service stargaze start'" >> ~/.bashrc
echo "alias starsstop='sudo service stargaze stop'" >> ~/.bashrc
source ~/.bashrc
```
#### Congratulations. You are now running a Stargaze Node.
# Page 2
# Xolana Validator Guide
Setup your Xolana (X1 SVM) Validator. This is a Solana fork that Jack Levin is currently testing out. Running your node helps in stress testing the network and address potential bugs.
**Disclaimer**:
Not financial advise. The only incentive you get from running a node is earning the right to ask Jack, "wen X1 mainnet?", "wen xolana?" or anything related to X1. Check the original source guide [here](https://x1.wiki/xolana/).
LFG!
### Requirement
You need to have a dedicated server that meets the basic requirements of:
* CPU: 3GHz or higher (recommended)
* RAM: 1TB or higher (recommended)
Get a server from Interserver. Use my referral link if you want:
## Setup Solana CLI
Run this command on your Terminal session:
```
sh -c "$(curl -sSfL https://release.solana.com/v1.18.15/install)"
```
Make sure the apply the PATH environment once the install is done. Test by running this:
```
solana --version
```
## System Tuning (Linux only)
This will make sure that your server runs the node properly.
Run the following commands on your Terminal session:
* Optimize sysctl knobs
```
sudo bash -c "cat >/etc/sysctl.d/21-solana-validator.conf </etc/security/limits.d/90-solana-nofiles.conf <
Once the build is done, check the version you are running
```
./target/release/solana-validator -V
```
You should see a prompt like this:
`solana-validator 1.18.15 (src:00000000; feat:4215500110, client:SolanaLabs)`
## Create Wallets
You need to create a main wallet `id.json` and 4 additional wallets for the validator namely; `identity.json`, `vote.json`, `withdrawer.json`, and `stake.json`.
Main wallet
```
solana-keygen new --no-passphrase -o id.json
```
4 additional wallets
```
solana-keygen new --no-passphrase -o identity.json
solana-keygen new --no-passphrase -o vote.json
solana-keygen new --no-passphrase -o withdrawer.json
solana-keygen new --no-passphrase -o stake.json
```
Take note of the seed phrases of your wallets. You might need them in the future.
### Fund Wallets
Connect CLI to Xolana Network by running this command:
```
solana config set -u http://xolana.xen.network:8899
```
Then airdrop 100 SOL to your main wallet.
```
solana airdrop 100
```
## Run Read Only Node
It is best practice to always run your node first in read only until it is fully synced.
Using the following command, this should run your server in read only.
```
nohup solana-validator --identity identity.json --limit-ledger-size 50000000 --rpc-port 8899 --entrypoint xolana.xen.network:8001 --full-rpc-api --log - --vote-account vote.json --max-genesis-archive-unpacked-size 1073741824 --no-incremental-snapshots --require-tower --enable-rpc-transaction-history --enable-extended-tx-metadata-storage --skip-startup-ledger-verification --no-poh-speed-test &
```
This will run the node in the background. You can check logs by running this command and see if it is working:
```
tail -f nohup.out
```
To check if your node is fully synced, you can run this command:
```
solana catchup --our-localhost
```
## Stake SOL Tokens
Send 100 SOL to identity.json address. PUBKEY or public key is the address of your generated wallets.
```
solana transfer 100 --allow-unfunded-recipient
```
Create Stake account
```
solana create-stake-account stake.json 10
```
Create Vote account
```
solana create-vote-account vote.json identity.json --commission 10
```
Transfer SOL to Stake account
```
solana transfer 10
```
Run Delegate Stakeke command
```
solana delegate-stake stake.json vote.json
```
Run Stake command
```
solana stake-account stake.json
```
Check your stakes on the vote.json address
```
solana stakes
```
## Relaunch Validator and Final Checks
Get ID of the running validator
```
ps aux | grep solana-validator
```
Kill validator
```
kill <# beside the logged in profile>
example:
kill 143551
```
Run the command again to check if it is still running.
```
ps aux | grep solana-validator
```
Run the validator using the following command:
```
nohup ./target/release/solana-validator --identity identity.json --limit-ledger-size 50000000 --rpc-port 8899 --entrypoint xolana.xen.network:8001 --full-rpc-api --log - --vote-account vote.json --max-genesis-archive-unpacked-size 1073741824 --no-incremental-snapshots --require-tower --enable-rpc-transaction-history --enable-extended-tx-metadata-storage --skip-startup-ledger-verification --rpc-pubsub-enable-block-subscription &
```
Check logs:
```
tail -f nohup.out
```
Check list of nodes and validators. Look for your identity and it should match the IP address of your server.
```
solana gossip
```
Finally, check validators list
```
solana validators
```
If your node does not have an exclamation warning, then it is running fine.
Congratulations, you have successfully ran your own Xolana Validator.
### Need Help?
Join Telegram: \
Watch Full guide video by Xenducation:
# Nillion Verifier
Step by step guide on how to setup a Nillion Verifier on Linux
This is for education purposes. Treat everything you see here as Not Financial Advise. Proceed at your own risk.
Disclaimer:\
This guide is for those running Linux. Nillion verifier can be run on a VPS.
The instructions you see here is based from the official site: . \
This is a companion guide when setting up your verifier.
Let's begin.
### Create a Nillion Wallet
Downlod Keplr wallet here:
Save your seed phrase and keep it secure. Do not share it with anyone else.
Go to then click on Verifier, to add the Nillion Testnet to your Keplr Wallet.
Next, search for NIL then click on Manage.
Put a check mark on NIL to add it to Keplr.
You should now be able to see your NIL address.
### Get NIL Tokens
Go to the [Nillion faucet](https://faucet.testnet.nillion.com/) to get some Testnet NIL tokens. Paste your address and complete the verification.
### Install Docker
Follow the steps here to install Docker on your machine. This guide is for Ubuntu 22.04. Check your OS version before you install Docker.
{% embed url="" %}
Check if the install was successful. Run the following commands to check the version and to try and load a test docker image.
```
docker --version
```
```
docker container run --rm hello-world
```
### Prepare Accuser Image
Download the image.
```
docker pull nillion/retailtoken-accuser:v1.0.0
```
Create local storage folder.
```
mkdir -p nillion/accuser
```
Initialize the image.
```
docker run -v ./nillion/accuser:/var/tmp nillion/retailtoken-accuser:v1.0.0 initialise
```
This will generate an Account ID and Public Key. Take note of the following information.
### Accuser Registration
On the Verifier page at Step 5. "Initialising the accuser", paste the Account ID and Public Key. Approve the transaction with Keplr.
If you have done that correctly, you will see the following screen. You need to wait at least 20-30 minutes before you proceed to next step.
#### While waiting, get some Testnet NIL tokens to the address generated by the Accuser. Follow the steps above to request for tokens. Do not skip this step.
### Run the Accuser
On Step 7, copy the command show.
Paste that on your terminal to Run the Accuser. Once it is done syncing then you will see a similar screen as below.
Take note of the prompts "Registered: true", this means that Verifier is fully synced.
If you do not see any increase in the number of Secret Stores Found and Challenges sent, then you need to do the following steps.
Stop the verifier by doing a CTRL + C. You might need to do this 3x to stop the program.
Next, run the following commands.
```
docker ps
```
Take note of your Container ID.
Run this command to restart it.
```
docker restart
```
Run the command:
```
sudo apt install jq
```
Finally, relaunch the Accuser with this command.
```
sudo docker run -v ./nillion/accuser:/var/tmp nillion/retailtoken-accuser:latest accuse --rpc-endpoint "https://nillion-testnet-rpc.polkachu.com" --block-start "$(curl -s https://nillion-testnet-rpc.polkachu.com/abci_info | jq -r '.result.response.last_block_height')"
```
After a few minutes, your Verifier should show some Secret Stores and Challenges sent.
Congratulations, you have succesffully launched a Nillion Verifier.
Follow:
# Inscribers
Want to mint an inscription? You came to the right place.
# Doginals
A minter and protocol for inscriptions on Dogecoin.
#### ⚠️⚠️⚠️ Important ⚠️⚠️⚠️
Use this wallet for inscribing only! Always inscribe from this wallet to a different address, e.g. one you created with DogeLabs or Doggy Market. This wallet is not meant for storing funds or inscriptions.
## Prerequisites
This guide requires a bit of coding knowledge and running Ubuntu on your local machine or a rented one. To use this, you'll need to use your terminal to setup a Dogecoin node, clone this repo and install Node.js on your computer.
### Setup Dogceoin node
Follow the instructions here to setup and sync your Dogecoin node: ()
#### ⚠️⚠️⚠️ Important ⚠️⚠️⚠️
A configuration file needs to be created before you continue with the sync. Stop your node:
```
./dogecoin-cli stop
```
Create a `dogecoin.conf` file at `/root/.dogecoin` folder. Set your own username/password.
```
nano dogecoin.conf
```
Copy and paste this to the created file. Save it!
```
rpcuser=ape
rpcpassword=zord
rpcport=22555
server=1
listen=1
txindex=1
rpcallowip=127.0.0.1
```
Start your node again
```
./dogecoind -daemon
```
How to check if your node is in sync with the network. On your `dogecoin` install folder, type the command `dogecoin-cli getinfo`
Compare the "blocks" value to the current block height via a Dogecoin explorer like: Do not mint anything yet unless your node is fully synced. You can proceed with installing the other requirements below.
\==========
### Install NodeJS
Please head over to () and follow the installation instructions.
```
curl -fsSL https://deb.nodesource.com/setup_21.x | sudo -E bash - &&\
sudo apt-get install -y nodejs
```
Check if they are installed by running the following commands:
```
node -v
```
v21.6.2
```
npm -v
```
10.2.4
These recent verions works with this minter.
**Cannot install Nodejs?**
If you are having trouble installing the latest version, remove nodejs and npm by using these commands.
```
sudo apt-get remove nodejs
sudo apt-get remove npm
npm list -g --depth=0
sudo apt-get autoremove
```
The `node-v` and `npm-v` commands should show an error that they are not installed. Procced with the install instructions above.
\==========
## Setup Shibescriptions
### **Clone Doginal minter**
On your Terminal, type the following commands:
```
cd
git clone https://github.com/zachzwei/doginals.git
```
### **Setup minter**
```
cd doginals
npm i
```
After all dependencies are solved, you can configure the environment:
### **Configure environment**
Create a `.env` file with your node information. Set your own username/password.
```
NODE_RPC_URL=http://127.0.0.1:22555
NODE_RPC_USER=ape
NODE_RPC_PASS=zord
TESTNET=false
FEE_PER_KB=69000000
```
You can get the current fee per kb from [here](https://blockchair.com/).
\==========
**⚠️⚠️⚠️ Important ⚠️⚠️⚠️**
### Before proceeding, please make sure your node is fully synced. Have fun!
## Creating a New Core Wallet
We will now create a new wallet on your Dogecoin node. Navigate to the install folder where you have extracted the files.
```
cd dogecoin-1.14.7
cd bin
```
Genereate new address with this command:
```
./dogecoin-cli getnewaddress
```
Example: `./dogecoin-cli getnewaddress z4ch`
Next, get the Private Key of this new address
```
./dogecoin-cli dumpprivkey
```
Example: `./dogecoin-cli dumpprivkey DCJPoswVPpctoaBSBcapVfkPPMwhFT7PPV`
Take note of the Private Key of the address. We will use this on the next step.
### Create Doginal Wallet
Navigate to the Doginals folder:
```
cd
cd doginals
```
Generate the .wallet.json file:
```
node . wallet new
```
Modify .wallet.json file:
```
nano .walet.json
```
Replace the DOGE Address and Private Key on this file and then save it.
You can now send some DOGE to this new address.
### Sync Balance with Core
Run the following command on your Doginals folder:
```
node . wallet sync
```
If your balance is shown, then you can proceed with minting some Doginals.
\==========
## Minting Doginals
**Note**: Please use a fresh wallet to mint to with nothing else in it until proper wallet for doginals support comes. You can get a paper wallet [here](https://www.fujicoin.org/wallet_generator?currency=Dogecoin).
### **Inscribe a file**
From file:
```
node . mint
```
From data:
```
node . mint
```
Examples:
```
node . mint DSV12KPb8m5b6YtfmqY89K6YqvdVwMYDPn dog.jpeg
```
```
node . mint DSV12KPb8m5b6YtfmqY89K6YqvdVwMYDPn "text/plain;charset=utf-8" 576f6f6621
```
### **Lazy image minter**
This script will allow you to mint and forger large files. Make sure your Doge wallet has enough funds before proceeding.
Make `image-mint.sh` executable
```
chmod +x image-mint.sh
```
Run the script with additional parameters
```
./image-mint.sh
```
Example: ./image-mint.sh \
**Incribing DRC-20**
```
node . drc-20 mint
```
Examples:
```
node . drc-20 mint DSV12KPb8m5b6YtfmqY89K6YqvdVwMYDPn dogi 1000
```
### **DRC-20 bulk minter**
This script will allow you to bul mint a DRC-20. Make sure your Doge wallet has enough funds before proceeding.
Make `bulk-mint.sh` executable
```
chmod +x bulk-mint.sh
```
Run the script with additional parameters
```
./bulk-mint.sh
```
Example: ./bulk-mint.sh <100> Check the max token count you can mint for the specific token.
### Viewing Doginals
Start the server:
```
node . server
```
And open your browser to:
```
http://localhost:3000/tx/15f3b73df7e5c072becb1d84191843ba080734805addfccb650929719080f62e
```
\==========
### Additional Info
**Protocol**
The doginals protocol allows any size data to be inscribed onto subwoofers.
An inscription is defined as a series of push datas:
```
"ord"
OP_1
"text/plain;charset=utf-8"
OP_0
"Woof!"
```
For doginals, we introduce a couple extensions. First, content may spread across multiple parts:
```
"ord"
OP_2
"text/plain;charset=utf-8"
OP_1
"Woof and "
OP_0
"woof woof!"
```
This content here would be concatenated as "Woof and woof woof!". This allows up to \~1500 bytes of data per transaction.
Second, P2SH is used to encode inscriptions.
There are no restrictions on what P2SH scripts may do as long as the redeem scripts start with inscription push datas.
And third, inscriptions are allowed to chain across transactions:
Transaction 1:
```
"ord"
OP_2
"text/plain;charset=utf-8"
OP_1
"Woof and "
```
Transaction 2
```
OP_0
"woof woof!"
```
With the restriction that each inscription part after the first must start with a number separator, and number separators must count down to 0.
This allows indexers to know how much data remains.
## Troubleshooting
**I'm getting ECONNREFUSED errors when minting**
There's a problem with the node connection. Your `dogecoin.conf` file should look something like:
```
rpcuser=ape
rpcpassword=zord
rpcport=22555
server=1
```
Make sure `port` is not set to the same number as `rpcport`. Also make sure `rpcauth` is not set.
Your `.env file` should look like:
```
NODE_RPC_URL=http://127.0.0.1:22555
NODE_RPC_USER=ape
NODE_RPC_PASS=zord
TESTNET=false
```
**I'm getting "insufficient priority" errors when minting**
The miner fee is too low. You can increase it up by putting FEE\_PER\_KB=300000000 in your .env file or just wait it out. The default is 100000000 but spikes up when demand is high.
**Other issues**
Try restarting your Dogecoin node. Stop your node by going to the `bin` folder and type the following command: `./dogecoin-cli stop`
Always make sure that the requirements are met.
If still stuck, ask ChatGPT or search online for other solutions.
\==========
### Screenshots
* Checking `node` and `npm` versions
* Cloning repository `git clone https://github.com/zachzwei/doginals.git`
* Running `npm install`
* Generating a new wallet `node . wallet new`

* Checking wallet balance after sending some ÐOGE. `node . wallet sync`

* Creating `.env` file and viewing it.

* Test mint of an image

# Bellscriptions
A minter and protocol for inscriptions on Bells forked from Ordinals Wallet.
#### ⚠️⚠️⚠️ Important ⚠️⚠️⚠️
Use this wallet for inscribing only! Always inscribe from this wallet to a different address, e.g. one you created with Ordinals Wallet. This wallet is not meant for storing funds or inscriptions.
## Prerequisites
This guide requires a bit of coding knowledge and running Ubuntu on your local machine or a rented one. To use this, you'll need to use your terminal to setup a Bellscoin node, clone this repo and install Node.js on your computer.
## Setup Bellscoin node
**Get Nintondo Core Wallet (v3)**
On your Terminal, type the following commands:
```
cd
wget https://github.com/Nintondo/bellscoinV3/releases/download/v3.0.0-rc2/bells-3.0.0-rc2-x86_64-linux-gnu.tar.gz
tar -xvzf bells-3.0.0-rc2-x86_64-linux-gnu.tar.gz
```
**Rename Bells folder**
**Will be much easier to navigate thru your folders.**
```
mv bells-3.0.0-rc2 bells
```
**Run Bellscoin node**
```
cd bells
cd bin
./bellsd -daemon
```
**Configure node**
Create a `bells.conf` file with your node information:
```
cd
cd ~/.bells
touch bells.conf
vi bells.conf
```
Copy and Paste the following into the `bells.conf` file
```
rpcuser=z4ch
rpcpassword=zord
rpcport=19918
server=1
listen=1
```
Wait for the node to fully sync. Check the status by typing the command `bells-cli getinfo` on the same directory.
### Install NodeJS
Please head over to () and follow the installation instructions.
Check if they are installed by running the following commands: `node -v` and `npm -v` 
## Setup Bellscriptions
### **Clone Bellscription minter**
On your Terminal, type the following commands:
```
cd
git clone https://github.com/ordinals-wallet/bellscriptions.git
```
### **Setup minter**
Install dependencies:
```
cd bellscriptions
npm install
```
Create a `.env` file with your node information:
On your Terminal, type the following commands:
```
touch .env
vi .env
```
Copy and Paste the following into the `.env` file
```
NODE_RPC_URL=http://127.0.0.1:19918
NODE_RPC_USER=z4ch
NODE_RPC_PASS=zord
TESTNET=false
FEE_PER_KB=3300030
```
## Funding
Generate a new `.wallet.json` file:
```
node . wallet new
```
Then send BELLS to the address displayed. Once sent, sync your wallet:
```
node . wallet sync
```
If you are minting a lot, you can split up your UTXOs:
```
node . wallet split
```
When you are done minting, send the funds back:
```
node . wallet send
```
## Minting
From file:
```
node . mint
```
Repeating:
```
node . mint
```
Examples:
```
node . mint BQQcsCCBiQn1aJsrrNzTg4Lm7MMd1PzZHq dog.jpeg
```
```
node . mint BQQcsCCBiQn1aJsrrNzTg4Lm7MMd1PzZHq mint.json 100
```
### Bellmap
You may bulk mint bellmap by specifying an address to receive and a start and end bellmap number
```
node . mint-bellmap
```
Examples:
```
node . mint-bellmap BQQcsCCBiQn1aJsrrNzTg4Lm7MMd1PzZHq 0 100
```
## Viewing
Start the server:
```
node . server
```
And open your browser to:
```
http://localhost:3000/tx/15f3b73df7e5c072becb1d84191843ba080734805addfccb650929719080f62e
```
### Protocol
The bellscriptions protocol allows any size data to be inscribed onto subwoofers.
An inscription is defined as a series of push datas:
```
"ord"
OP_1
"text/plain; charset=utf8"
OP_0
"Woof!"
```
For bellscriptions, we introduce a couple extensions. First, content may spread across multiple parts:
```
"ord"
OP_2
"text/plain; charset=utf8"
OP_1
"Woof and "
OP_0
"woof woof!"
```
This content here would be concatenated as "Woof and woof woof!". This allows up to \~1500 bytes of data per transaction.
Second, P2SH is used to encode inscriptions.
There are no restrictions on what P2SH scripts may do as long as the redeem scripts start with inscription push datas.
And third, inscriptions are allowed to chain across transactions:
Transaction 1:
```
"ord"
OP_2
"text/plain; charset=utf8"
OP_1
"Woof and "
```
Transaction 2
```
OP_0
"woof woof!"
```
With the restriction that each inscription part after the first must start with a number separator, and number separators must count down to 0.
This allows indexers to know how much data remains.
### FAQ
#### I'm getting ECONNREFUSED errors when minting
There's a problem with the node connection. Your `bellscoin.conf` file should look something like:
```
rpcuser=z4ch
rpcpassword=zord
rpcport=19918
server=1
```
Make sure `port` is not set to the same number as `rpcport`. Also make sure `rpcauth` is not set.
Your `.env file` should look like:
```
NODE_RPC_URL=http://127.0.0.1:19918
NODE_RPC_USER=ape
NODE_RPC_PASS=zord
TESTNET=false
```
#### I'm getting "insufficient priority" errors when minting
The miner fee is too low. You can increase it up by putting FEE\_PER\_KB=300000000 in your .env file or just wait it out. The default is 100000000 but spikes up when demand is high.
# Miners
Cloud GPU mining guides
# Merge Mining LTC+DOGE+BEL
A quick guide on how to mine Litecoin, Dogecoin and Bellscoin via Merge Mining
**Disclaimer**:\
The following guide is based on my personal experience not to be taken as financial advise. Mining cryptocurrencies does not always result to an immediate return of investment. If you understand the risk and would like to know the procedure, then read on.\
The guide covers setting up an account, payment address and configuring your mining pool settings.
### Requirements
\* A [ViaBTC](https://www.viabtc.com/signup?refer=1777107) account or any mining pool that supports merge mining.\
\* An ASIC cloud mining service like [Nicehash](https://www.nicehash.com/).\
\* A crypto wallet that support LTC and DOGE ([Trust Wallet](https://trustwallet.com/)) and BEL ([Nintondo](https://nintondo.io/)).\
\* BTC for funding your miner.
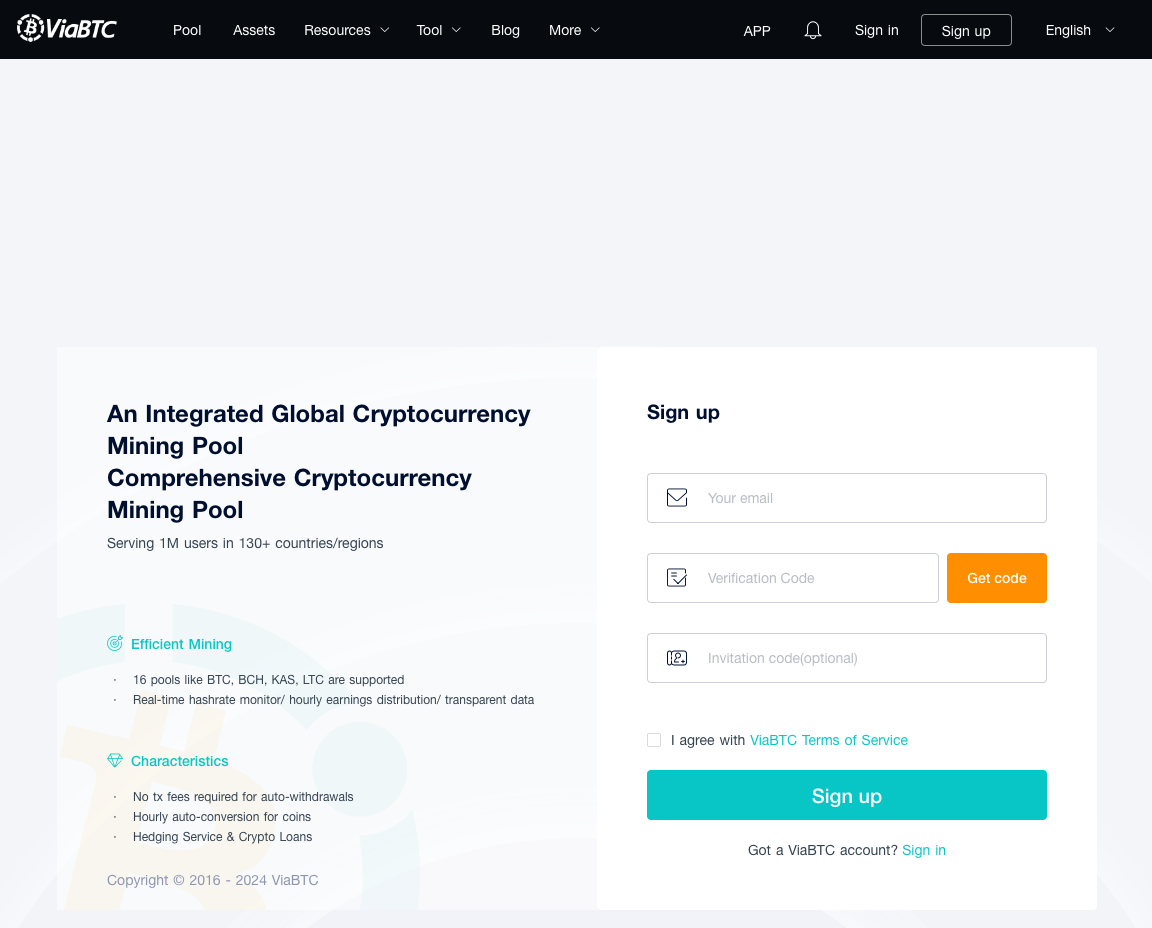
### Create ViaBTC Account
Sign up to ViaBTC via this [link](https://www.viabtc.com/signup?refer=1777107). \
Note:\
This includes my referral ID.
### Set Automatic Withdrawal Address
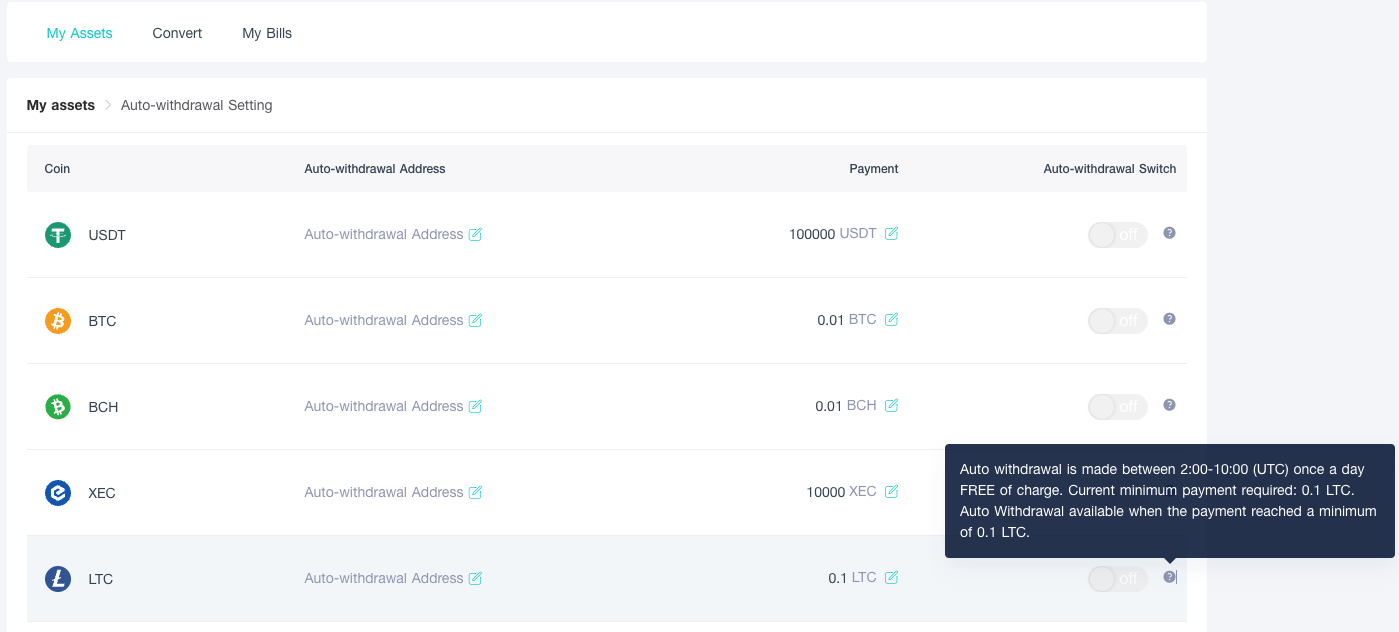
Once you create an account on ViaBTC, your mining rewards will automatically go to the Assets section. Click on the "Assets" tab to view them.
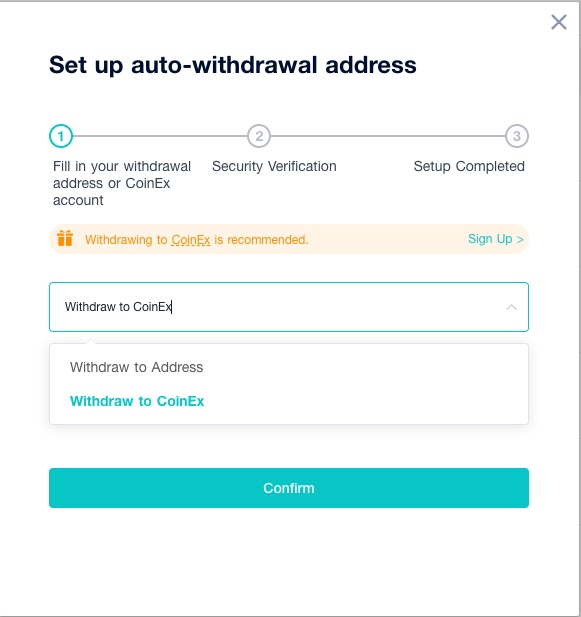
Click on "Auto-Withdrawal Setting" to set an Address for the crypto that will be automatically sent to your own wallet or to your CoinEX address. Auto withdrawal will only happen based on the limit that you set. For example, LTC rewards will be automatically withdrawn when it reaches 0.1 LTC.
You can always withdraw it manually anytime.
### Get Mining Pool Settings
Click on Pools to see the Miner Configuration screen.
Note:
Create a Miner ID in the based on your account name (example: z4ch or z4ch.workerID) and any password for it. WorkerID should consist of numbers and lowercase letters no longer than 64 characters.
### Create a NiceHash Account
Register with [NiceHash](https://www.nicehash.com/my/register) and complete the verification.
### Fund your NiceHash wallet
Send BTC to your NiceHash wallet. Rentals are all priced in BTC, so it is better to just deposit BTC directly. Wait for confirmation until the balance shows up on your wallet.
Wait for confirmation until the balance shows up on your wallet. It usually takes 3 confirmations.
### Setup a Mining Order
Click on the Hashpower Marketplace, and select Scrypt.
Choose between EU and USA locations. If you are going to use a mining pool that is located in the EU, then it would be best to choose a miner in the same location. Click on + New Order and fill up all the required details. This is where you need to set the information that you got from [ViaBTC](https://www.viabtc.com/signup?refer=1777107).
Test the pool. If everything checks out, you will be ready to place an order.
If you are encountering errors with the Pool difficulty, set it to d=500000
### Place Mining Order
#### Set the BTC/TH/day.
This will determine how much you are willing to pay for a TH/day. Choosing a higher amount would usually result to more miners picking up your order, but would also result to getting your order completed quickly.
#### Set the Limit (TH/s).
#### This allows you to set the maximum hashing power that you want to get. Remember that the higher the hashing power, the more shares you get from the pool. Every pool has a different estimated reward depending on how much hashing power you're miners are running.
#### Set Amount
Input how much BTC you are going to allocate for this order.
Place the order and wait for the miners to pick it up. Since this is similar to an auction, the miners will prioritize orders that would entail them the maximum profit.
Congratulations, you are now mining Litecoin including Dogecoin and Bellscoin. You can also monitor progress of your miner/worker on ViaBTC and see estimated rewards.
An estimate of miner rewards for LTC, DOGE and BEL. Take this info with a grain of salt.
If you are confused about the Hashrate values, you can check this [hashrate converter](https://minerstat.com/hashrate-converter) for a quick conversion.
Note:\
You can check my thread on X regarding my test on Merge mining [here](https://x.com/ZachZwei/status/1827337318342259115). If this guide has helped you, please follow me on X and share it.
# Shaicoin
Shaicoin is a CPU mineable cryptocurrency that operates as a fork of Bitcoin, focusing on a unique mining algorithm known as ShaiHive. The following guide is for those who are familiar running Linux
Disclaimer:\
This is not financial advise. Mining can damage your hardware.
### Get Started
This guide is purely made for those who wants to try mining [$SHA](https://x.com/search?q=%24SHA\&src=cashtag_click) with their Linux machines. \
Do not have a Linux computer or spare CPU to mine? \
Rent one here: [https://cloud.vast.ai/?ref\_id=94252](https://t.co/BgNghk4FL4)
The steps involved include:
\* Setting up a Shaicoin Core Wallet
\* Generating a [$SHA](https://x.com/search?q=%24SHA\&src=cashtag_click) address
\* Building [$SHA](https://x.com/search?q=%24SHA\&src=cashtag_click) miner
\* Connecting to a mining pool
### Setting up Core Wallet
On your Terminal, run the following commands:
#### Install dependencies
```
sudo apt install build-essential libtool autotools-dev automake pkg-config bsdmainutils python3 libevent-dev libboost-dev libsqlite3-dev -y
```
#### Clone the repo
```
git clone https://github.com/shaicoin/shaicoin
cd shaicoin
```
#### Build the wallet
```
./autogen.sh
./configure
```
Depending on the number of CPU cores of your machine, the next command will require you to indicate that number. The build process might take a while. Please be patient.
```
# example make -j8
make -jmake -j [# CPU cores]
```
### Run Core Wallet and Sync
#### Run Wallet
Navigate to the `/src` folder and then run the following command to launch the core wallet in the background.
```
./shaicoind -daemon
```
#### Check Logs
To view the logs navigate to the `.shaicoin` folder.
```
cd
cd .shaicoin
```
Next, run this command.
```
tail -f debug.log
```
Wait for your core wallet to fully sync before you proceed to the next step.
To check the current block, go here: [https://blocks.shaicoin.com](https://t.co/OSFKwpJ5IO). Compare the "height" value shown on the logs to the most recent block on the Shaicoin block explorer.
### Generate Wallet
Navigate to `/shaicoin/src` folder:
```
cd
cd shaicoin
cd src
```
Then run the command to generate a wallet:
```
./shaicoin-cli createwallet "yourwalletname"
```
You can put in a wallet name that you like.
Next, generate a [$SHA](https://x.com/search?q=%24SHA\&src=cashtag_click) address:
```
./shaicoin-cli getnewaddress
```
Take note of the address since this will be used for your miner.
### Backup Wallet
Always make a backup of your wallet. Here is how to do it.
Go back to the `.shaicoin` folder to see your wallet backup.
```
cd
cd .shaicoin
cd wallets
```
Save the contents of the folder in order to restore your wallet in case you need to move to a different machine.
### Build [$SHA](https://x.com/search?q=%24SHA\&src=cashtag_click) miner
#### Install dependencies
```
apt install libssl-dev
```
#### Install Rust
Run the following command:
```
curl https://sh.rustup.rs -sSf | sh
```
Then choose option "1". Once it is done, set the PATH:
```
source "$HOME/.cargo/env"
```
#### Clone Shaipot miner
```
cd
git clone https://github.com/shaicoin/shaipot.git
cd shaipot
```
#### Build miner
Run the following command:
```
cargo rustc --release -- -C opt-level=3 -C target-cpu=native -C codegen-units=1 -C debuginfo=0
```
### Run the SHA miner
Get your [$SHA](https://x.com/search?q=%24SHA\&src=cashtag_click) address that you have generated and use that for the command to run your miner. You can follow this format:
```
./target/release/shaipot --address sh1xxxxxxxxxxxxxj --pool ws://162.220.160.74:3333
```
Make sure to change the address, or else your mining rewards will go to me.
Run the command and that is it. You are now mining [$SHA](https://x.com/search?q=%24SHA\&src=cashtag_click).
### Update Miner (Optional)
If you are still using the initial version of the miner, you can update it to get better hash rates. \
Here are the steps to do so.
Stop your miner, Use CTRL+C. Make sure you are in the `shaipot` directory.\
Run the following commands:
```
cd
cd shaipot
git pull
```
After downloading the latest version, recompile miner.
```
cargo rustc --release -- -C opt-level=3 -C target-cpu=native -C codegen-units=1 -C debuginfo=0
```
Run miner again to see a much better performance.
### Check Miner Status
Check your progress here:
Pool address:
Rewards will automatically be distributed once the coins that the pool receives reaches a maturity of a 100 blocks.
Thanks for reading!
#### Shameless plug...
If you do not want to mine $SHA, you can get it from exchanges.\
Here is my referral link for NonKYC:
CoinGecko is already tracking the price:\
Follow [@shai\_pow](https://x.com/shai_pow) on X and go to their Discord: [https://discord.gg/vrfvbrDU](https://t.co/8INwdtdfhf)
# Shaicoin Solo Pool
The following steps is for those who want to create their own solo mining pool. Works best if you want to consolidate all your hashing power.
Once you have done the steps in setting up your Core Wallet, \
You can go ahead and configure your own solo mining pool. Let's proceed.
### Configure RPC ports
Stop your core wallet by going to the `/shaicoin` folder and run the following command:
```
cd
cd shaicoin
./shaicoin-cli stop
```
You can check your node to confirm it has already stopped.
Next, create a `shai.conf` file on your `.shaicoin` directory. Here are the steps:
```
cd
cd .shaicoin
touch shai.conf
```
Open the `shai.conf` file...
```
nano shai.conf
```
Copy and paste the following. Then save it. CTRL X, Y then Enter
```
# Enable RPC server
server=1
# Set the username and password for RPC
rpcuser=user
rpcpassword=password
# Optional: Bind to your IP address (leave localhost for local connections)
rpcbind=127.0.0.1
# RPC listening port
rpcport=8710
# Allow only connections from localhost
rpcallowip=127.0.0.1
# Maximum number of connections
maxconnections=16
# Enable logging (optional)
logtimestamps=1
```
Start your node and let it sync again to the network.
```
cd
cd shaicon
cd src
./shaicoind
```
### Install Solo Pool repo
Install **Node.js 23.x**:
Before you begin, ensure that `curl` is installed on your system. If `curl` is not installed, you can install it using the following command:
```
sudo apt-get install -y curl
```
1. **Download the setup script:**
```
curl -fsSL https://deb.nodesource.com/setup_23.x -o nodesource_setup.sh
```
2. **Run the setup script with sudo:**
```
sudo -E bash nodesource_setup.sh
```
3. **Install Node.js:**
```
sudo apt-get install -y nodejs
```
4. **Verify the installation:**
```
node -v
```
Copy the Shaicoin Solo Backend repo.
```
cd
git clone https://github.com/shaicoin/shaipot-solo-backend.git
cd shaipot-solo-backend
```
Install Dependencies
```
npm install
```
Build Native Addon
```
npm run build
```
### Configure Solo pool
Open `config.json` file.
```
nano config.json
```
and change the information based on your node settings. Then save it.
```
{
"rpc_url": "http://your_rpc_server:port",
"rpc_username": "user",
"rpc_password": "password",
"pool_shaicoin_address": "your_pool_address"
}
```
Here is an example:
### Run Solo pool
Run your solo pool with this command:
```
node server.js
```
### Connect miners
Using the same command for connecting to a mining pool, make sure you set the correct IP:port for the --pool settings.
```
./target/release/shaipot --address sh1xxxxxxxxxxxxxj --pool ws://161.97.130.233:3333
```
Your mining pool will also indicate once a miner is connected to it. Congratulations you have successfully setup your own solo mining pool.
Note:\
You can also use the same approach for creating a public mining pool.\
See instructions here:\
# Tidecoin
This is a quick guide on how to mine Tidecoin with your CPU.
## Disclaimer
Mining can cause hardware issues to your device. I am not responsible for any damage this can cause to you or to your machine. Proceed at your own risk. This guide is intended for educational purposes only. I am using a rented GPU/CPU miner via Vast in order to mine Tidecoin. I am not mining on my own computer. The guide is purely based on a Linux CLI (Command Line Interface), so most of the commands to run the miner will be done manually.
## Requirements
* A dedicated computer. You can rent one via Vast by using this link: [Vast AI.](https://cloud.vast.ai/?ref_id=94252\&template_id=3ef6c152e7b056ad868c0f2a69cb4f6f)
* A Tidecoin wallet. I suggest using the core wallet here: [Tidecoin Wallet.](https://github.com/tidecoin/tidecoin/releases/)
* (Optional) [Tidecoin Web Wallet](https://tdc.cash/). If you do not want to download core wallet.
### Download Miner
On your terminal, create a directory. Then go to the created directory. Copy and run the commands:
```
mkdir tidecoin
cd tidecoin
```
Next, download the miner for Linux OS. Use this command:
```
wget https://github.com/rplant8/cpuminer-opt-rplant/releases/download/5.0.41/cpuminer-opt-linux-5.0.41a.tar.gz
```
This will download the CPU miner files to the directory created.
### Extract Miner
Run the following command to extract the miner on the directory.
```
tar -xf cpuminer-opt-linux-5.0.41a.tar.gz
```
### Create Miner Profile
Go to and then on the left navigation bar click on Tidecoin. Next click on Connect. You will see a screen like this:
Fill out the following details as shown on the screenshot:
Remember to put your own address and worker name. The nearest stratum will depend on your location. As you can see I have chosen Linux/MacOS as my OS.
Next, copy the miner script that was created by the template and then go back to your Terminal.
### Create the Miner Script
On your terminal, create a script file which will continously run on your machine. Run the command:
```
nano tide_miner.sh
```
If you do not have `nano` installed, just run the command:
```
apt install nano
```
Paste the miner script to the created file and save it.
Set the permissions of the miner script.
```
chmod +x tide_miner.sh
```
### Run the Miner
You can now run the miner script on your machine. Make some final checks and ensure the configuration is correct.
```
./tide_miner.sh
```
This command will run your miner and will start hashing Tidecoin blocks.
### Monitor your Miner
To check the activity of your miner. Go back to and then click on the My Miner tab. Paste your address and then click on Set.
You should now see your workers that are mining Tidecoin.
### Miner Payments
Mining rewards for is specified on the Tidecoin page.
You can also see the current progress of your rewards on the same screen.
Note: The miner is also available for MacOS and Windows. If you are using Windows, you can use the same steps above by using Powershell.
Once you reach the minimum payout of 5 $TDC. It will be sent to the address you have setup on the miner.
I would highly recommend using the core wallet to keep your Tidecoin secure.
Not your keys, not your crypto.
### Closing
This coin was created by [YarSawyer](https://github.com/yarsawyer/tidecoin). Please show support for his work by following him on his socials.
More details can be found here:
If you just want to go ahead and buy Tidecoin, you can go to [Xeggex](https://xeggex.com/?ref=66e05ecdf6dc403d67b9a50e).\
Not financial advise.
Shameless plug...
If you do not want to mine $SHA, you can get it from exchanges.\
Here is my referral link for NonKYC:
Tidecoin is now on CoinGecko: \
\
Follow my journey mining Tidecoin on X.\
# XENBlocks XNM Miner
Start mining XNM using your GPU. Cloud GPU also supported.
Learn more about XENBlocks here: \
NOT Financial Advice!
### Requirements
* Linux
* Cuda capable GPU
Use my Vast link (optional) to rent a machine that can mine XNM. Click [here](https://cloud.vast.ai/?ref_id=94252\&creator_id=94252\&name=nvidia%2Fcuda%3A12.4.1-devel-ubuntu22.04).
## How to mine XNM
* Copy and Paste the following to a terminal session:
```
#!/bin/bash
wget https://github.com/woodysoil/XenblocksMiner/releases/download/v1.3.1/xenblocksMiner-1.3.1-linux.tar.gz
tar -vxzf xenblocksMiner-1.3.1-linux.tar.gz
chmod +x xenblocksMiner
echo -e "\n10" | ./xenblocksMiner
```
Note:
Change \ to the destination ETH address.
n10 means that there is a dev fee of 1% sent to the creator of xenblockminer, [woodysoil](https://github.com/woodysoil/XenblocksMiner/).
* Hit Enter to run the miner. Profit!
The miner will be downloaded and will be run with the specified settings.
Congratulations, you are now mining XNM.
## AutoRun Miner (Optional)
You can create an onstart.sh file on your root directory that will autorun the miner if your machine reboots.
Just copy the commands above and then type the following on your terminal:
```
nano onstart.sh
```
Then paste your commands. Save file. That is it.
Join XENBlocks Telegram here:
# SolXEN Miner (Mainnet)
Shaking up rusty Solana
## **Disclaimer!**
Not Financial Advise. Educational purposes only.
Source:
This miner is designed to utilize all Solana threads which was not possible on Devnet (also Mainnet) Solana. This guide has 2 versions of the miner, namely Node.js (Simple) and Rust (Advanced). You can install all requirements needed if you want.
This is now the live SolXEN on Solana Mainnet-Beta.\
Token Contract: [EEqrab5tdnVdZv7a4AUAvGehDAtM8gWd7szwfyYbmGkM](https://solscan.io/token/EEqrab5tdnVdZv7a4AUAvGehDAtM8gWd7szwfyYbmGkM)
Trade on Raydium:
## Create SOL Wallets
### Install Solana CLI
This will be used to generate your wallet.
Run the following command:
```
sh -c "$(curl -sSfL https://release.solana.com/v1.18.4/install)"
```
Make sure that you are connecting to Solana Mainnet:
```
solana config set --url https://api.mainnet-beta.solana.com
```
### Generate wallets
Run the following command:
**Remember to backup your seed phrase. If you lose this, you will lose access to your wallet.**
```
solana-keygen new --derivation-path --no-passphrase -o ~/.config/solana/id0.json
```
This will generate a new keypair and save it on the `.config` directory.
Take note of this directory which will be used later.
Run the command again while replacing the file name (idx.json) to generate a total of 4 addresses.
```
solana-keygen new --derivation-path --no-passphrase -o ~/.config/solana/id1.json
solana-keygen new --derivation-path --no-passphrase -o ~/.config/solana/id2.json
solana-keygen new --derivation-path --no-passphrase -o ~/.config/solana/id3.json
```
You now have 4 Solana wallets namely, id0.json, id1.json, id2.json and id3.json that are located at the `/.config/solana/` folder.
**Remember to backup your seed phrase. If you lose this, you will lose access to your wallet.**
### Fund your SOL addresses
Buy or Get Solana from exchanges. There is no free airdrops.
## Choose a Miner
You can run a Simple miner or an Advanced miner. The only difference is that a Simple miner will can be run on a single terminal utilizing all 4 wallets. Unlike with an Advanced miner where you need to individuall run separate miners for each wallet. You can install all pre-requisites below or just choose which ever miner you want to run.
### Install Nodejs (Simple miner)
You need to have latest `node.js` installed before you proceed. Run the following command.
Copy
```
curl -fsSL https://deb.nodesource.com/setup_22.x | sudo -E bash - &&\
sudo apt-get install -y nodejs
```
Check if the install was successful by typing `node --version`.
### Install Rust (Advanced miner)
```
cd
curl https://sh.rustup.rs -sSf | sh
```
Set path
```
source $HOME/.cargo/env
```
Update Rust
```
rustup update
```
## Setup SolXEN Miner
### Clone SolXen miner
Clone the SolXEN repository:
```
git clone https://github.com/FairCrypto/sol-xen.git
cd sol-xen
```
### Configure miner
Create a `.env` file:
```
nano .env
```
Paste the following and the save file. Make sure to set the correct path for your SOL wallet.
```
USER_WALLET_PATH=../.config/solana/
ANCHOR_PROVIDER_URL=https://api.mainnet-beta.solana.com
```
Save the file.
#### Note:
Since this is the mainnet version, you will be competing with other transactions being submitted on the Solana network. The RPC provided below "" is a public (free) Solana RPC. You can sign up to paid ones if you want to get a dedicated RPC for your miner.\
Check here:
## Run SolXEN miner
### SolXEM miner (Easy Miner)
This allows you to mine SolXEN on a single session. It will utilize all 4 wallets created.
After installing Node.js, run:
```
npm i
```
Run miner:
```
node ./client/multiminer.js mine --address --f 10000 --delay 1 --units 1150000 --autoMint 1000
```
Make sure to set your own ETH address.
Congratulations, you are now mining SolXen.
Note:
The "--f" setting tells your miner what priority fee you want to use. You can always check the recommended values here:\
### Run SolXEN miner (Advanced)
These commands need to be run individually on each separate terminal or session (via tmux).
Use your own ETH address for every command.
\---
Notice that the id0.json file is being used here and --kind 0 is set for this miner.
```
export USER_WALLET=../.config/solana/id0.json # change the path if necessary
while true; do cargo run --package sol-xen-client -- --address --command mine --kind 0 --fee 100000; sleep 10; done
```
Notice that the id1.json file is being used here and --kind 1 is set for this miner.
```
export USER_WALLET=../.config/solana/id1.json # change the path if necessary
while true; do cargo run --package sol-xen-client -- --address --command mine --kind 1 --fee 100000; sleep 10; done
```
Notice that the id2.json file is being used here and --kind 2 is set for this miner.
```
export USER_WALLET=../.config/solana/id2.json # change the path if necessary
while true; do cargo run --package sol-xen-client -- --address --command mine --kind 2 --fee 100000; sleep 10; done
```
Notice that the id3.json file is being used here and --kind 3 is set for this miner.
```
export USER_WALLET=../.config/solana/id3.json # change the path if necessary
while true; do cargo run --package sol-xen-client -- --address --command mine --kind 3 --fee 100000; sleep 10; done
```
This is how it would look like if you are using tmux to run 4 separate sessions.
#### Mint SolXEN token (for Advanced miner)
The token needs to be minted manually. Open up a new terminal and run the following commands individually for every wallet id and --kind instance. Make sure to set the same ETH address as your miners.
```
export USER_WALLET=../.config/solana/id0.json # change the path if necessary
cargo run --package sol-xen-client -- --address --command mint --kind 0
```
```
export USER_WALLET=../.config/solana/id1.json # change the path if necessary
cargo run --package sol-xen-client -- --address --command mint --kind 1
```
```
export USER_WALLET=../.config/solana/id2.json # change the path if necessary
cargo run --package sol-xen-client -- --address --command mint --kind 2
```
```
export USER_WALLET=../.config/solana/id3.json # change the path if necessary
cargo run --package sol-xen-client -- --address --command mint --kind 3
```
## Check Leaderboard
Check your current miner rank here:
## Check Balance on Phantom
To view your SolXEN balance, you need to import your address to [Phantom](https://phantom.app/download).
Navigate to your Solana config directory.
Then type:
```
cat idx.json
```
Replace "x" with the wallet id that you want to get the keypair.
You will see a set of numbers separated by commas.
Copy the entire contents of the idx.json file including the \[ ]. Paste it on the Import Private Key screen of Phantom to restore the wallet.
If you have done that correctly, you will be able to restore your address and all balances will be shown.
Note:\
The screenshot above shows there are 2 SolXEN tokens. The first token was not transferrable, and thus cannot be trade. Make sure you are running the updated miner. To do so, simple stop your miner and run the following command:
```
git pull
```
Then run your miner again.
## References
* Thanks to [xen\_artist](https://twitter.com/xen_artist) for his [guide](https://x1.wiki/solxen/).
* Join SoLXEN Telegram:
* Follow on X
# Nimble Network
Nimble is building the first-ever decentralized AI framework. This guide is for educational purposes only. Use at your own risk.
## Mining Nimble on Ubuntu
Source:
These instructions are targeted towards those who have a bit of command line experience with Linux.
You can rent a Cloud GPU running Ubuntu 22.04 by using this link: [https://cloud.vast.ai](https://cloud.vast.ai/?ref_id=94252\&creator_id=94252\&name=nvidia%2Fcuda%3A12.4.1-devel-ubuntu22.04)\
Set storage size to at least 250GB and use the following configuration:
Update: Check out my step by step [guide](https://x.com/ZachZwei/status/1771400654633992235) from renting a GPU to running the miner (with screenshots).
### Install Tmux
Using [Tmux](https://github.com/tmux/tmux/wiki) will ensure that your session will always run on your machine. To install it (if its not pre-loaded), just run the command:
```
sudo apt install tmux
```
Next, run Tmux to begin setting up your Nimble Wallet and Miner.
```
tmux
```
If you get disconnected from your instance. Just type:
```
tmux a
```
As long as the instance is not restarted, you can always go back to your session with this command.
### Install GO
Before you proceed, check first if Go is installed. Run the following command:
```
go version
```
If you get the prompt above, that means Go 1.22.1 is installed. This is the minimum version required.
If you have a lower version or if its not installed then proceed with the next step.
Copy the commands below and run it on your Terminal.
```
sudo apt update
wget https://go.dev/dl/go1.22.1.linux-amd64.tar.gz
rm -rf /usr/local/go && tar -C /usr/local -xzf go1.22.1.linux-amd64.tar.gz
export PATH=$PATH:/usr/local/go/bin
```
Check the Go version that was installed.
```
go version
```
It should display the go version 1.22.1.
### Install Nimble’s Wallet CLI
Note: Git is required to copy the Github repo of Nimble.
```
sudo apt install git
mkdir $HOME/nimble && cd $HOME/nimble
git clone https://github.com/nimble-technology/wallet-public.git
cd wallet-public
make install
```
### Generate a Nimble Wallet
Note:
(This step is necessary to generate a Nimble address. If you already a master and miner wallets, then you can just skip this step.)
Navigate to the folder where the wallet was installed. Use the following commands.
```
cd
cd go/bin
./nimble-networkd keys add
```
Type a passphrase, retype it.\
A `nimblexxxx` address will be generated after following the necessary prompts. Save your address and the seed phrase in a secure place.
#### Master Wallet (Important)
Generate at least 2 addresses.
One of which will be used as your Master Wallet, then other a Miner wallet.
Join Nimble Discord to register your addresses:
### Setup Nimble Miner
Note: python3.9 (or above) and pip3 are required for the remaining steps
```
sudo apt update
sudo apt install python3-venv
```
Go back to your Terminal and start building the miner.
```
cd
cd nimble
git clone https://github.com/nimble-technology/nimble-miner-public.git
cd nimble-miner-public
make install
```
Activate the miner
```
source ./nimenv_localminers/bin/activate
```
### Run Nimble Miner
Copy the Nimble address generated from the Nimble wallet. Replace the \ on the command below.
```
make run addr=
```
You can stop the miner by pressing CTRL+C\
To resume mining, re-run the command.
### Troubleshooting
* Build Errors\
Having an older version of GO will cause errors in building the wallet and miner.\
Uninstall GO by running these commands one at a time.
```
sudo apt-get remove golang-go
```
```
sudo apt-get remove --auto-remove golang-go
```
* Update Miner\
There has been some tasks that are not being completed successfully. Update your miner as soon as possible. \
Press CTRL + C to stop your miner. Run `git pull` to get the latest version of the miner.\
Continue mining by running the `make run addr=`
\===========
You are now mining $NIM!
For assistance, Join Nimble Discord server - \
Official website - [https://www.nimble.technology](https://www.nimble.technology/)
# Useful Tools
* [Webmin](https://webmin.com/download/) is a web-based system administration tool for Unix-like servers, and services that can used to configure operating system internals, such as users, disk quotas, services or configuration files, as well as modify, and control open-source apps, such as BIND DNS Server, Apache HTTP Server, PHP, MySQL, and many more.\\
```
curl -o setup-repos.sh https://raw.githubusercontent.com/webmin/webmin/master/setup-repos.sh
sudo sh setup-repos.sh
# follow next prompt to install
```
* [NCDU](https://ostechnix.com/check-disk-space-usage-linux-using-ncdu/) is a simple and fast disk usage analyzer which is used to find which directories or files are taking up more space either on a local or remote systems.\\
```
sudo apt install ncdu
# replace / = path you want to check
ncdu -x /
```
* [Prometheus](https://prometheus.io/docs/introduction/overview/) is an open-source systems monitoring and alerting toolkit with an active ecosystem. It is the only system directly supported by Kubernetes and the de facto standard across the cloud native ecosystem.
* QUAI CLI balance checker
```
cd
cd go-quai
wget https://raw.githubusercontent.com/zachzwei/z4chzwei.github.io/refs/heads/main/tools/install_quai_balance.sh
chmod +x install_quai_balance.sh
./install_quai_balance.sh
```
# Docker and Docker Compose Setup
Here’s a complete step-by-step guide to installing Docker and Docker Compose on Ubuntu 22.04
Step 1: Update the Package Index
Open your terminal and run the following command to update your package index:
```bash
sudo apt update
```
#### Step 2: Install Required Packages
Install the necessary packages that allow `apt` to use packages over HTTPS:
```bash
sudo apt install apt-transport-https ca-certificates curl software-properties-common
```
#### Step 3: Add Docker’s Official GPG Key
Download and add Docker’s GPG key using the recommended method:
```bash
curl -fsSL https://download.docker.com/linux/ubuntu/gpg | gpg --dearmor | sudo tee /etc/apt/trusted.gpg.d/docker.gpg > /dev/null
```
#### Step 4: Add the Docker Repository
Add the Docker repository to your system:
```bash
sudo add-apt-repository "deb [arch=amd64] https://download.docker.com/linux/ubuntu $(lsb_release -cs) stable"
```
#### Step 5: Update the Package Index Again
After adding the Docker repository, update the package index again:
```bash
sudo apt update
```
#### Step 6: Install Docker
Now, install Docker:
```bash
sudo apt install docker-ce
```
#### Step 7: Start and Enable Docker
Start the Docker service and enable it to run on startup:
```bash
sudo systemctl start docker
sudo systemctl enable docker
```
#### Step 8: Verify Docker Installation
Check if Docker is installed correctly by running:
```bash
sudo docker --version
```
You should see the installed version of Docker.
#### Step 9: Install Docker Compose
1. **Download the Latest Version of Docker Compose**:
Find the latest version from the [Docker Compose GitHub releases page](https://github.com/docker/compose/releases). As of now, you can use the following command (replace `v2.14.2` with the latest version if needed):
```bash
sudo curl -L "https://github.com/docker/compose/releases/download/v2.14.2/docker-compose-$(uname -s)-$(uname -m)" -o /usr/local/bin/docker-compose
```
2. **Apply Executable Permissions**:
Make the Docker Compose binary executable:
```bash
sudo chmod +x /usr/local/bin/docker-compose
```
3. **Verify Docker Compose Installation**:
Check if Docker Compose is installed correctly by running:
```bash
docker-compose --version
```
You should see the installed version of Docker Compose.
#### Step 10: Manage Docker as a Non-root User (Optional)
If you want to run Docker commands without `sudo`, you can add your user to the `docker` group:
1. **Add Your User to the Docker Group**:
Replace `username` with your actual username if you're specifying it:
```bash
sudo usermod -aG docker $USER
```
2. **Log Out and Back In**:
Log out of your current session and back in to apply the group change. Alternatively, you can run:
```bash
newgrp docker
```
####